Chickpea chicken salad jars are a convenient and healthy meal option that you can easily prepare ahead of time and enjoy on the go.
I love salads for a workday lunch, but I hate how expensive and frankly, sad, many bought salads are. Now that I know the tricks for making and keeping layered jar salads fresh for days at home, I hardly ever buy a salad. My wallet and my belly are far happier.
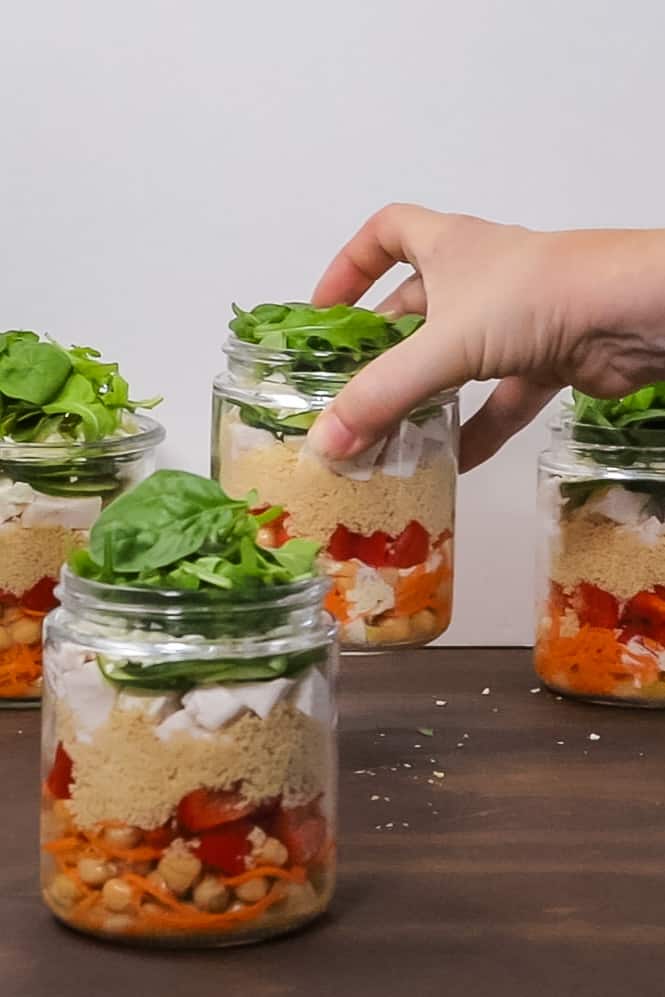
These chickpea salad jars are made by layering all the different ingredients in a large mason jar, although any tall container will work. Layering allows all the salad ingredients to remain as fresh as possible, so you’ll have a bright, vegetable and protein-packed meal at your fingertips whenever you need it.
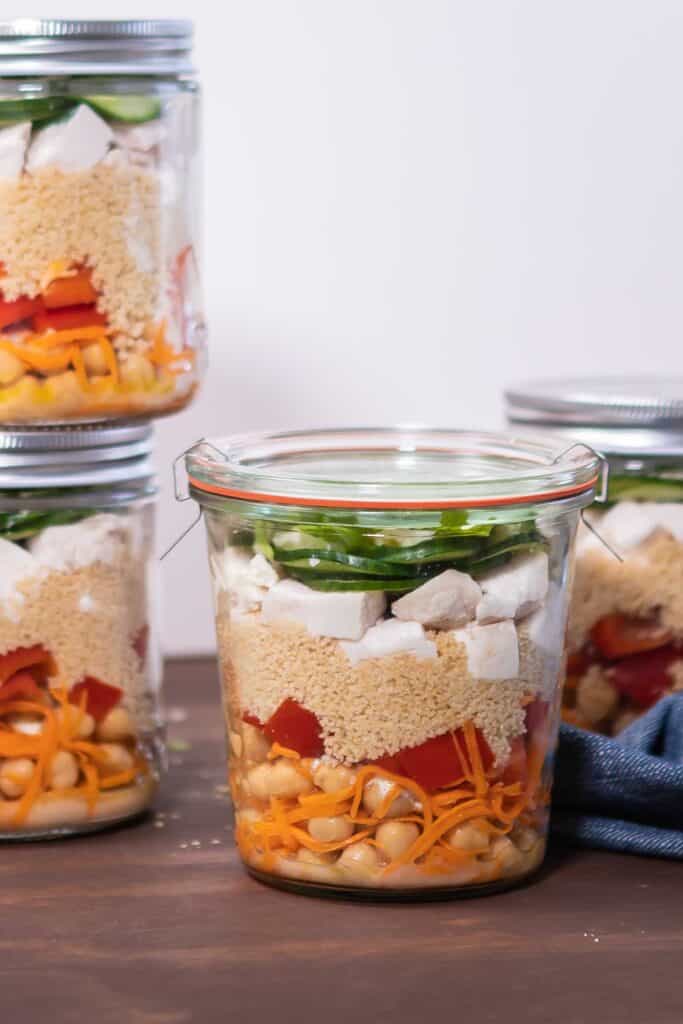
Read on to learn more about layered salad jars and how to adapt my chickpea chicken salad jars to your own taste preferences, including a vegan version.
This post may include affiliate links. As an Amazon Affiliate I earn from qualifying purchases (don’t worry, it doesn’t cost you anything!). Find out more about affiliate links.
What’s the point of chickpea chicken salad in a jar?
Layered jar salads are undeniably pretty, but the real reason I love them isn’t appearance based.
Salad in a jar, whether it’s this chickpea chicken salad or any other, stays fresh and fabulous for days. Not because of the jar. Because of the layers.
Making salad where you put the sturdier ingredients on the bottom and highly perishable ones on top means you can assemble the entire dish, pop a lid on and leave it in the fridge. It’ll keep far better than if you’d dressed and mixed everything, because the ingredients which wilt when dressed don’t actually touch the dressing until it’s time to serve.
When you’re ready to eat, you just upend the jar into a bowl, stir and enjoy.
Enjoying this article? Try these other gorgeous salads:
Chicken Caesar Salad
Vegan Brussels Sprouts Salad with Cranberries and Pecans
Meatball Bowls with Chickpeas
Mexican Poached Chicken Salad
Top tips for making chickpea chicken salad jars
- Use a jar with a wide mouth. This makes it easier to put your ingredients in, and easier to tip them out when you want to eat the salad later.
- Consider the order in which you build your salad. Go for firmer, sturdy, happy-to-be-dressed ingredients on the bottom, working your way up the layers to soft ingredients like leafy greens on top.
- Think about how your layers will work together. Choose ingredients with lots of colors and textures, and layer those flavors too. The best salads are pretty AND interesting to eat.
- Be sure you fill your jars right to the top. They stay fresher than if the container is only partially filled, thanks to less airflow in and around the ingredients.
- Use the freshest ingredients you can find. This sounds trite, but it helps the salad jars stay fresh for days after making. I easily get 4 days out of my jar salads if I start with very fresh food.
- Take that jar out of the fridge! I love a salad eaten cool but not fridge-cold, so I try to bring mine out about a half hour before serving.
Do you want to use and love your steam oven more?
There are precious few resources to teach us HOW to use a steam oven in everyday cooking. I’m guessing that’s why you’re here! If you love cooking but aren’t making the most of your combi steam oven, you aren’t alone.
Steam Oven Insiders was created for you!
Benefit from my decade-plus of steam oven knowledge and training, delivered to your inbox twice monthly in bite sized, easy-to-implement tips and delicious recipes you’ll actually want to cook. Insiders get access to every exclusive recipe and article within the members dashboard, so you’ll never miss a thing.
Find out more right here
How to create your best salad jars
The bottom layer
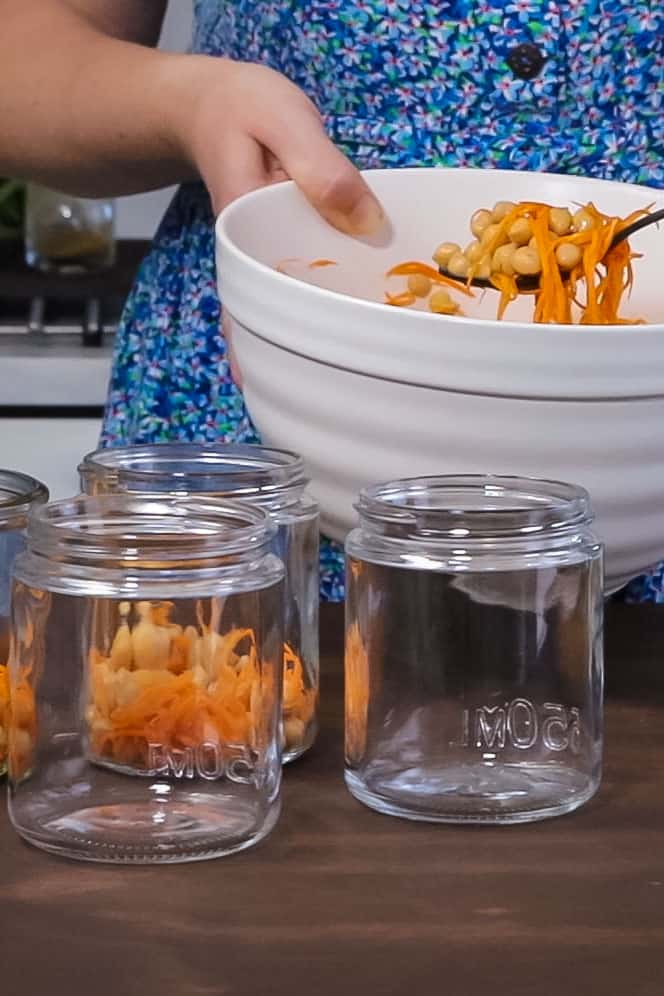
The bottom layer should be ingredients which are both sturdy AND which can be dressed without adverse effects. Chickpeas and carrots in today’s case, but cooked beans, peas and corn are also good candidates here.
This is also a good time to add any extra flavors by way of a spice mix or marinade. I toss my chickpeas and carrots in spices and lemon before putting them in the jar. It gives them a lovely burst of extra flavor when they’re mixed into the salad; one that’s separate from the flavors of the dressing. Is it necessary? Nope. But it’s worth the small extra step.

Dressing
Let’s talk about dressing. Spoon it over those base ingredients; it will run through and settle at the bottom of the jar, which is fine. I’ve made a roasted garlic and yogurt dressing in the recipe below. If you already have a jar of roasted garlic on hand, this is a breeze. If not, you can roast your own, or mince a clove of fresh garlic instead.

Grains and extra veg
Next up, put in vegetables and grains which are sturdy but don’t survive well once dressed. Bell peppers and couscous were my choice today. Again, though, mix it up! Cherry tomatoes are great in a layered salad; so are leftover grilled or roasted vegetables. Wild rice, quinoa or pasta can all be used for the grain component of your salad jars.
Protein
Time for some protein. I love sous vide chicken and often have it in my fridge, but you can use any sliced or shredded cooked meat.

Leafy greens
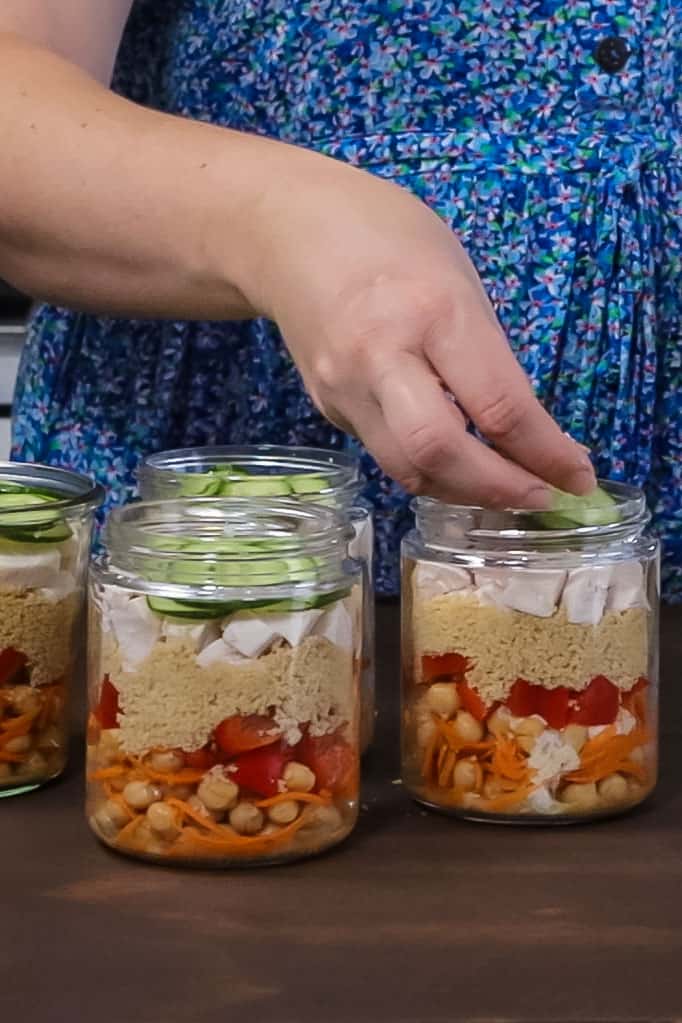
Finally, layer in delicate vegetables and leafy greens. I put sliced cucumbers at the top of my salad jars, along with arugula and spinach leaves. This is also the time to add what I call ‘salty punch and crunch’ things. Think crumbled feta cheese, olives, capers, toasted nuts and seeds. These are technically optional but they add so much interest. I don’t know about you but I am far more likely to look forward to a salad that’s full of contrasting textures and flavors! Salad in a jar is cute but it’s nothing if it doesn’t taste amazing too.
Want to make vegan salad jars instead?
If you’d like a vegan version of my salad jars recipe, read on! Whether you’re a fully fledged vegan or, like me, just enjoy meat free meals a lot of the time, vegan salad jars are one of those dishes that even hard core carnivores tend to enjoy. Here’s how to adapt the recipe:
- Omit the yogurt in the dressing, substituting it for vegan mayo or coconut yogurt.
- Leave out chicken in favor of cubed marinated firm tofu or broken-up store bought falafel balls.
- Replace crumbled feta with roasted walnuts, almonds or cashew nuts and a handful of toasted pumpkin seeds.
Go forth and start layering all your salads! Kidding. That would be weird. But definitely give it a try and see how much more exciting your weekday lunches get when you have the fun of a pretty jar to enjoy.
Happy cooking, see you here again soon.
Have you made and enjoyed this recipe? I’d love if you’d be kind enough to rate and review it via the stars in the recipe card, or leave a comment below! Ratings and reviews help other readers to find and know whether one of my recipes will suit them.
Chickpea Chicken Salad Jars with Garlic Yogurt Dressing
Ingredients
Salad
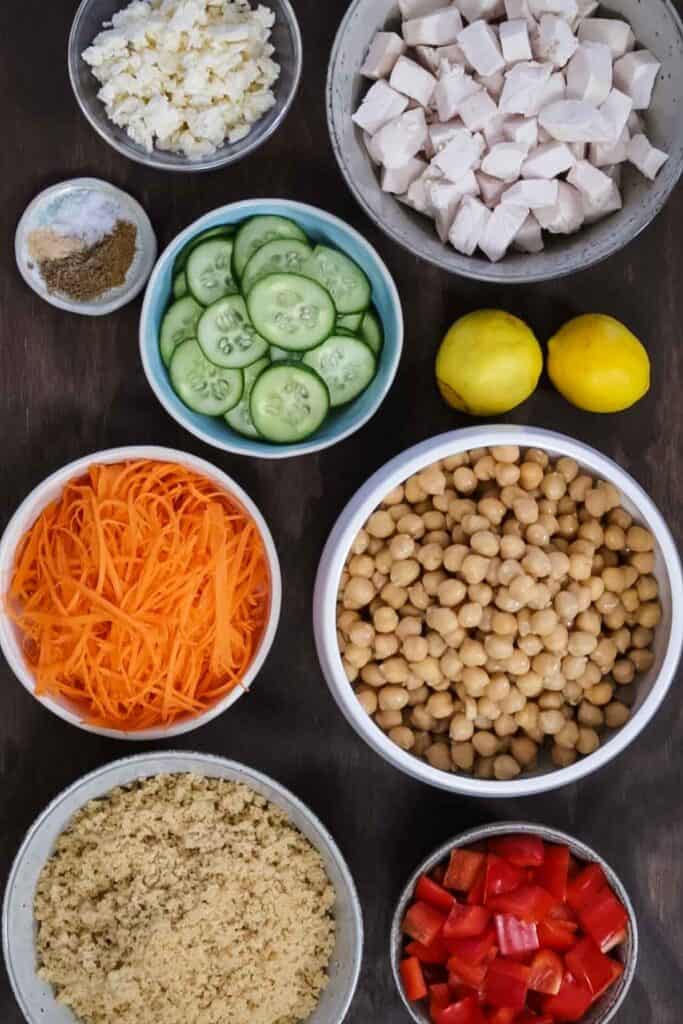
- 1 1/2 cups cooked chickpeas drained volume (or use 1 x 14oz/400g can)
- 2 carrots medium size, shredded
- 1/2 tsp ground cumin
- 1/2 tsp ground coriander
- 1/4 tsp garlic powder
- 1/2 tsp flaky salt
- 1 lemon zested and juiced
- 1 bell pepper red or yellow, diced
- 1 1/2 cups cooked couscous or quinoa, rice or pasta
- 13 oz cooked chicken breast chopped, to give about 2 cups chopped volume
- 2 Lebanese cucumbers thinly sliced
- 1/2 cup feta cheese crumbled volume, about 3oz (80g)
- 4 cups baby spinach or arugula/rocket, or a mix of the two
Roasted Garlic and Yogurt Dressing
- 1/3 cup yogurt plain unsweetened, Greek style
- 1/4 cup olive oil
- 2 Tbsp lemon juice from about 1 medium lemon
- 2 cloves roasted garlic or 1/2 clove fresh garlic, minced
- 1/2 tsp flaky salt
- 1/2 tsp cracked black pepper
Instructions
- Make the dressing: mix all the ingredients together in a jar with a screw-top lid and shake well. Taste and adjust seasoning if necessary, then set aside.1/3 cup yogurt, 1/4 cup olive oil, 2 Tbsp lemon juice, 2 cloves roasted garlic, 1/2 tsp flaky salt, 1/2 tsp cracked black pepper
- Mix the chickpeas and carrots with the spices, garlic powder and lemon juice, then divide evenly between your jars. Divide the dressing over the top of the chickpeas.1 1/2 cups cooked chickpeas, 2 carrots, 1/2 tsp ground cumin, 1/2 tsp ground coriander, 1/4 tsp garlic powder, 1 lemon, 1/2 tsp flaky salt
- Layer in the chopped peppers, then couscous, chicken and cucumber. Sprinkle in the crumbled feta and add a big handful of greens to the top of the jar. Pop a lid onto each jar before storing in the fridge for up to 3-4 days.1 bell pepper, 1 1/2 cups cooked couscous, 13 oz cooked chicken breast, 2 Lebanese cucumbers, 1/2 cup feta cheese, 4 cups baby spinach
- To serve, tip the contents of a jar into a bowl and mix everything together.
Notes
- You can change the salad ingredients in these jars to accommodate pretty much any vegetable, grain or protein you like. I often leave out the chicken and bump up the quantity of chickpeas (you could also add a chopped boiled egg if that’s your thing). If I have leftover brown or wild rice I’ll happily use that instead of couscous or quinoa. Pasta works too.
- If you want to make this a vegan salad, switch the yogurt in the dressing for vegan mayo or coconut yogurt. Omit the chicken in favor of marinated tofu or falafel balls, and sub out the feta for toasted nuts, sunflower or pumpkin seeds for extra protein and crunch.
- I find these layered salads keep really well for about 2-3 days in the fridge, and are still fine on the fourth day if I’ve used very fresh ingredients to start with. If you need longer shelf life, you can prep the ingredients and store separately in the fridge for up to 5 days, which will give you a working week’s worth of lunches. Just layer everything up in the morning before you head off to work.


