
This post includes affiliate links. Find out more about affiliate links and how they help this site.
Let’s have a discussion about how to steam rice properly, shall we?
I have been going along thinking surely everyone knew how to steam rice, and that using your steam oven to do so wasn’t much of a jump. Except it turns out a lot of you have asked for help with this exact topic recently! It’s brought to my attention the fact I need to give you all some more ‘how to’ posts so you can build your confidence and cooking repertoire with your steam ovens.
And so, a steam oven guide to cooking rice.
Why cook rice in a steam oven?
Cooking rice in the steam oven is very easy in terms of effort, and the results are similar to what you’ll get by using the stove top absorption method or a rice cooker (yes, that means you should give away your rice cooker if you have a steam oven, you won’t be needing it anymore!).
The big reason I like cooking my rice in the steam oven is that it’s pretty much foolproof, as long as you follow the correct ingredient ratios and cook for the right time.
When you use the steam oven, there are some variations for rice to liquid ratios and slight adjustment of cooking times but overall it’s pretty simple. Plus, you get the bonus of perfectly cooked rice without having to worry about lowering the heat of a pot on the cook top enough, or scrubbing out the stuck-on layer at the bottom of your rice cooker after dinner (or maybe that was just my rice cooker!).
Some favorite dishes to serve with your amazing rice:
Maple, Lime and Ginger Chicken
Christmas Rice Salad with Pistachios and Cranberries
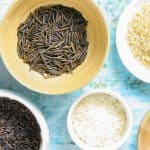
Downloadable rice steaming guide
Rice is one of those things we should all be able to cook at the drop of a hat. Though the carb police might say otherwise, it’s a great way to bulk out a meal and is more easily tolerated by (most) people’s stomachs than bread or pasta.
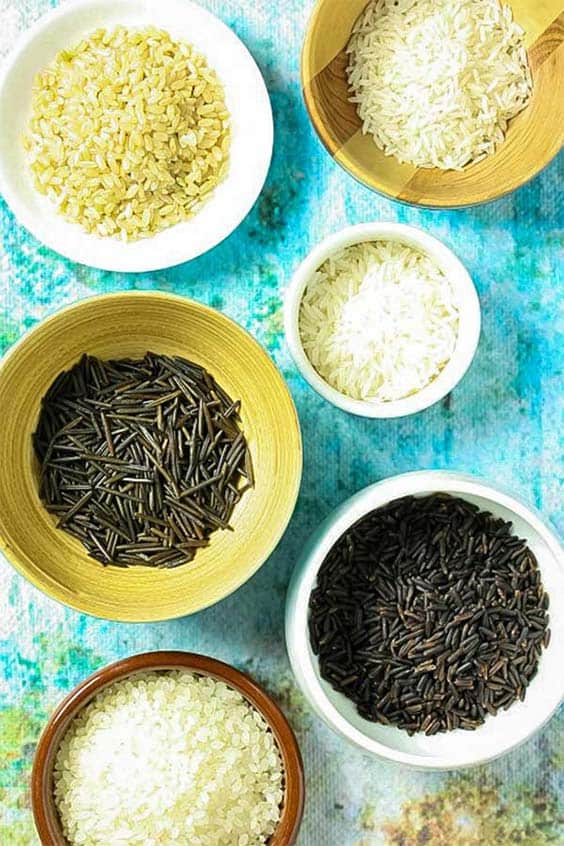
There are countless varieties of rice from the fragrant long grain Basmati and Jasmine rices to short grain, brown, sushi, red, black and wild rice. If you can follow basic directions and master cooking a few different types in your steam oven you’ll always have the base for a quick dinner or a simple but filling salad at hand.
This chart is not exhaustive but it covers all the major varieties of rice I ever cook in my steam oven. If there’s something not shown, you’ll probably be able to figure it out based on one of the other types of rice listed. I hope you find it useful and can return to it over and over until you’ve memorised your favourites.
Go to this post to download the chart which shows you how to cook the most popular rice varieties in your steam oven, or use the guide below for simple steamed white rice.
Tips for perfect steam oven rice
This recipe is easily multiplied. You can keep the ratios of rice, water and cooking time the same as long as you’re still steaming in a fairly shallow pan.
The cooking times (and sometimes the quantity of liquid needed) for rice can vary according to how old your rice is and how humid your climate. I tend to buy and use rice within about 6 months at most (very old rice can be quite ‘dry’, requiring more liquid and longer cooking times).
A note about cooking vessels: the below measurements work for rice cooked in a thin, even layer in a stainless steel pan. Most people will be able to use the solid pans which come with their steam oven for this. I use the smaller (1/3 size) pan for 1 cup uncooked rice, and the larger one (2/3 size) for 2-3 cups uncooked rice.
Try not to use a glass or thick ceramic dish to steam your rice. It’ll take longer to cook and won’t be as evenly steamed.
Happy cooking, see you here again soon.
Want to know what else you can cook in a steam oven? Get my Steam Oven Cheat Sheets now, with more than 35 ideas for foods to cook with the steam and combi steam settings!
How to Cook Rice in a Steam Oven
Ingredients
- 1 cup long grain white rice Jasmine or regular long grain
- 1.5 cups water room temperature
Instructions
- Put the rice and water into a large shallow stainless steel pan.
- Put the pan in your steam oven and set to 100°C/212°F on the steam-only setting (100% humidity). Set your timer for 20 minutes. If you have a full sized steam oven rather than a compact one, set 22-23 minutes to allow a little extra time for the larger oven cavity to heat up.
- When the timer goes off, remove the pan from the oven, fluff the rice with a fork and leave it to sit for 2 minutes before serving.
Nutrition
Over to you – if you try this method for cooking rice I’d love to know about it! Share your comments below or on Facebook, tag @steamandbake on Instagram, or pin all your favourite Steam and Bake recipes over on Pinterest!
Would you like more recipes and tips to help you cook with confidence? Join the mailing list to be alerted to new posts.


10 Responses
1) Yes, this is going into a cold oven (and using room temperature water).
2) A contentious thing, the oven timers issue! In this case, where I ask you to start from a cold oven, I’m referring to the time from when you turn the oven on. So yes, it would beep after exactly 20 (or 22-23) minutes. Those duration timers can be tricky because, as you say, you don’t really know how long the cooking is vs the heating up time. If you have estimated cooking times in your oven’s manual, those will have been tested to include the heat up time plus whatever time is needed for cooking, but it makes it difficult to adapt the duration when you’re cooking something outside of their recommended dishes or guides! Generally, that duration timer default is done by one brand in particular because they believe it’s a big selling point to be able to cook everything from a cold start, for energy efficiency and time efficiency reasons. In many instances, if you want to cook from a preheated start, you can get around it by setting a duration timer to get the oven going, then changing the timer to whatever you want it to be once it’s preheated and you put the food in. For this cold start option, I think your best bet might be to set, say, 15 minutes on the duration timer, assuming that will give you around 20+ minutes in the oven. You’ll have to take note and find the ideal timing for your rice in your own oven, though – once you know it, you’ll be able to just set that exact number of minutes every time. Hope that makes sense.
A couple of quick questions, Emily:
1) in this dish, it look like you put the rice/water into a cold oven (not preheated as per other recipes)?
2) when you set the timer for 20 (or 23) minutes, is this a minute timer which will beep exactly 20 mins after you turn the oven on? Our oven also has a duration timer, which will beep after 20 mins at the correct temperature (so probably after around 25+ mins in the oven). This duration timer is used in all my oven’s estimated cooking times, which makes it tricky to work out how long they really mean…..
Thank you for the tips so that I can learn how to cook rice in my combi steam oven.
☺️
I think it’s a common misconception that absorption dishes like rice, pulses etc won’t need any water if you steam them! But yes, they definitely still need the water to absorb into the starches and swell them up.
No-one told me to put water in with the rice in the steam oven. Thought all the steam would do that – ha ha ha. I will learn. Swedish oven tells me nothing!!!
Is the rice cooked and there’s just extra liquid in the pan, or is it still underdone? If it’s cooked, just try dropping the quantity of water down a little to see if that helps. If it’s not cooked, though, perhaps your oven just takes a little longer to come to temperature. In that case if you add an extra 5 minutes to the timer that might help. Also, make sure you fluff the rice and let it stand for a couple of minutes at the end of cooking. If there’s just a bit of water in the pan this is usually enough to help it absorb into the rice and even things out.
Hi thx for sharing your tips. I always end up having a lot of water in the bottom of my pan after the cook time of about 22-25mins. Steam mode only 100% humidity at 212 degrees. I have tried following the the recipes exactly. Any idea what am i doing wrong here. Please help thx
Hi Joan, they should work for any steam oven so long as it can do ‘full’ steam (ie 100% humidity at 100C/212F). Thanks for your feedback – I’ve got lots more basic tips coming over the next few months so stay tuned for more like this!
Hello, thanks for giving such basic information, I have really struggled to find rice info for my new oven. Do these instructions work for a vario steam oven?
Thank you for including red rice in your chart! What a diverse resource!