This post includes affiliate links. Find out more about affiliate links and how they help this site.
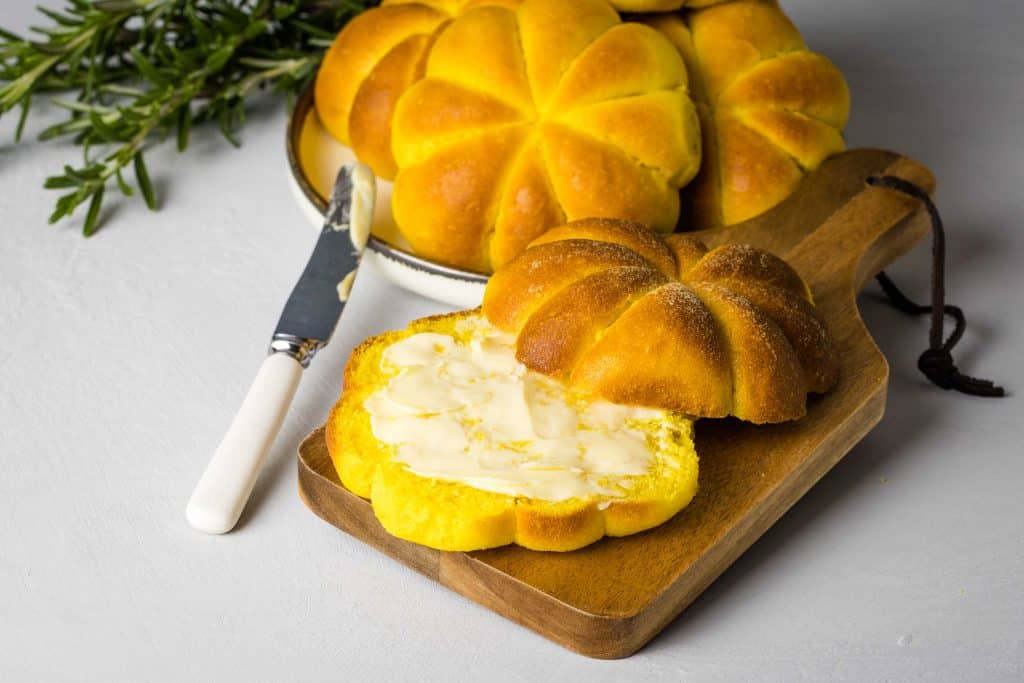
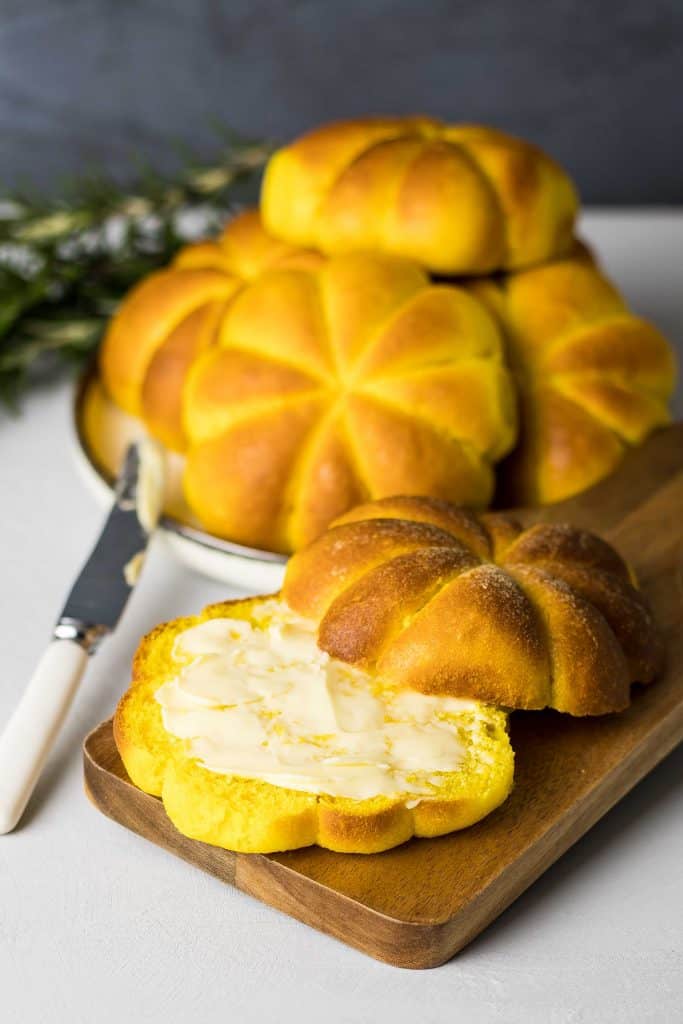
These gorgeous pumpkin dinner rolls are an adaptation of one of the past year’s most popular recipes here, my easy potato rolls.
Instead of potato, they’ve got a good amount of – you guessed it – pumpkin mixed through the dough, which keeps them moist and fluffy and gives them the most lovely orange color.
You can bake these dinner rolls in a regular oven or a steam oven (I’ve listed methods for both below) and either way they’re such a nice thing to add to the table when you have guests.
I’m planning to bake another batch for Halloween in a few weeks, and send them to school as a snack for the kids that’s not 95% sugar. The kids will looove me, ha.
The pumpkin shape of these rolls, which I created using string, is completely optional. It takes a little longer when you’re shaping the rolls but it is cute enough to make just about anyone, even the pumpkin haters, want to try one.
How easy are pumpkin dinner rolls to make?
I think even if you’re a bread novice, these rolls are pretty simple. The dough is very forgiving and easy to work with, and it’s easily made in a mixer or by hand.
Apart from the roasting and pureeing of the pumpkin (for which you could use canned if you prefer), pumpkin rolls are easy enough that I’ve had my 3 year old help me turn out a batch. There was flour all over the kitchen but we made a very nice pan of rolls together.
How to make pumpkin bread rolls

Mix the dough:
You’ll need some pumpkin puree ready to go for this recipe. Canned if you must, but making your own will give much better flavor and color to the finished rolls. Head over to my how to roast pumpkin in a steam oven post from last week if you need a few pointers on cooking and pureeing your own pumpkin.
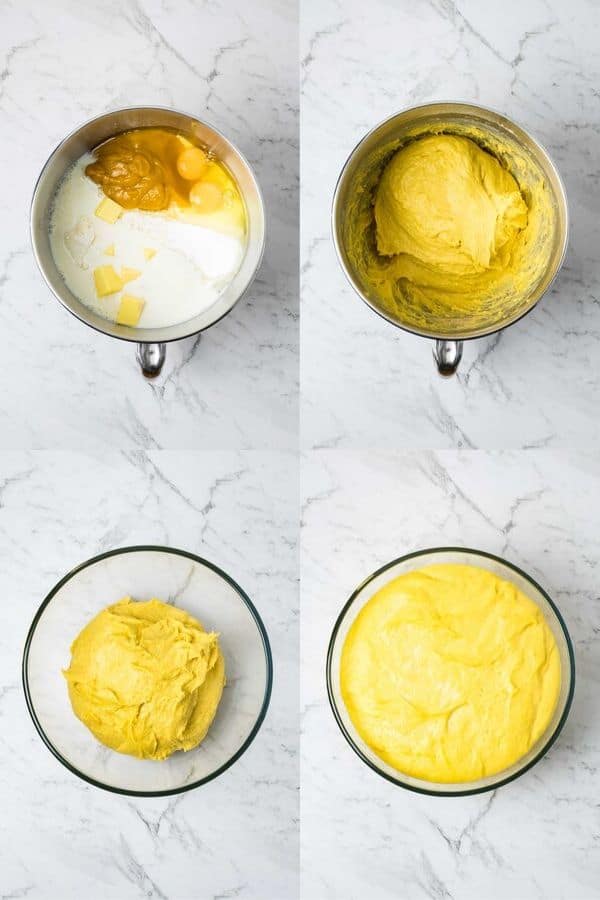
Once the puree is ready, it’s as simple as putting everything into a mixer bowl and turning on your machine! You can definitely do this step by hand, just allow for some arm-muscle building as you stir everything and then knead it together.
You’ll end up with a lovely orange dough. Pop it into a clean, oiled bowl and let it double in size (the time taken for this will depend on whether you’re proving the dough in a steam oven or at room temperature – see the full recipe below).
Form the rolls:
Time to create your little pumpkin-y masterpieces! Turn the proved dough onto a floured surface and gently press it out into a rectangle. It doesn’t need to be really thin, around an inch or two thick is just fine. Cut the dough into sixteen even pieces and then form each one into a ball. I do this by pinching up the sides and bringing them into the centre, while turning the dough. When you’ve got a roughly roundish shape, flip it over and cup the palm of your hand over the dough, gently moving it in little circles to form a smooth ball. Repeat until you’ve used up all the pieces of dough.

Make the pumpkin shape (optional):
If you want to create rolls which vaguely resemble pumpkins, as I’ve done in the photos, you’ll need some kitchen string and a little oil. If that sounds like too much trouble, just make round rolls and no one except you will know the difference!
Cut 16 lengths around 28”/70cm from the string. Put a little vegetable or olive oil on your fingertips and run each piece of string through those fingers so it’s lightly greased. I did not oil the string the first time I made these, and it got stuck fast to the cooked rolls later, so I tore most of them getting it off. Learn from my mistake!
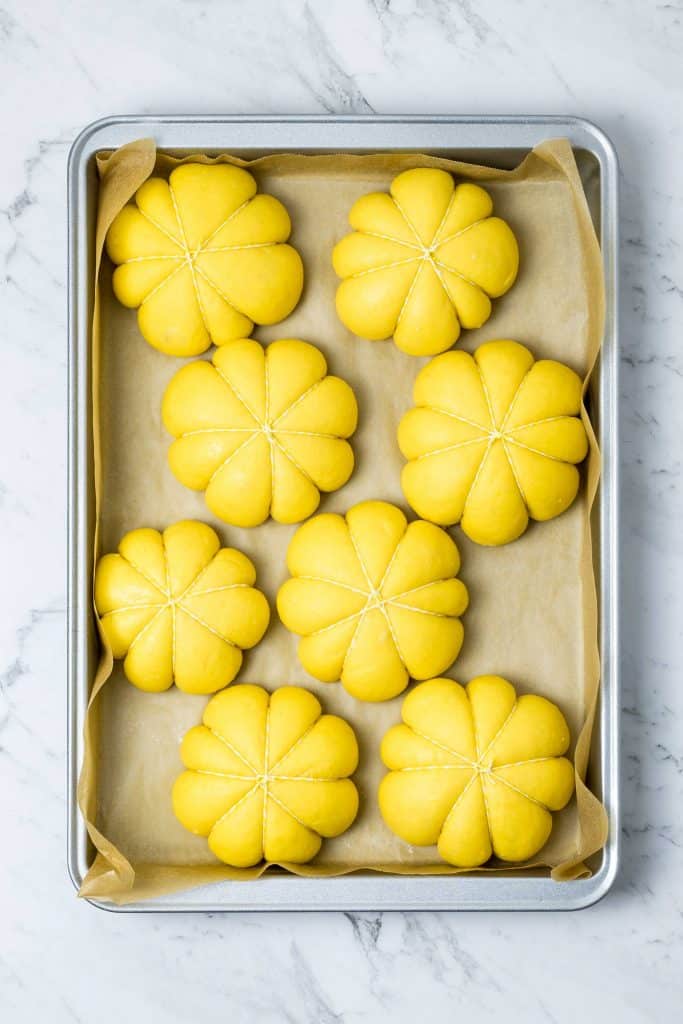
Take a dough ball and a piece of string and place the string over the top of the dough. Carefully turn the dough + string over and cross the string on the underside, as if you’re tying ribbon around a gift. Turn it over again and repeat the process so you’ve got 8 little segments between the string. Tie a loose knot at the top and snip off any excess string. The most important thing in this process is to make sure the string isn’t at all tight. The rolls are going to rise and puff around the string, so if it’s too tight it’ll end up cooking inside the rolls and you won’t be able to cut it off without breaking them open.
Repeat the string for each roll, then put the rolls onto a couple of lined baking pans. I used two 9×12”/23x30cm pans, and could just squeeze 8 rolls onto each. They touched ever so slightly during baking but came apart easily afterwards.

Do a second proof and bake the rolls:
Set the rolls aside or prove them in your steam oven until they’ve almost doubled in size again, then bake until they’re puffed and golden brown on top. Turn them onto a cooling rack as they come out of the oven.
Remove the string:
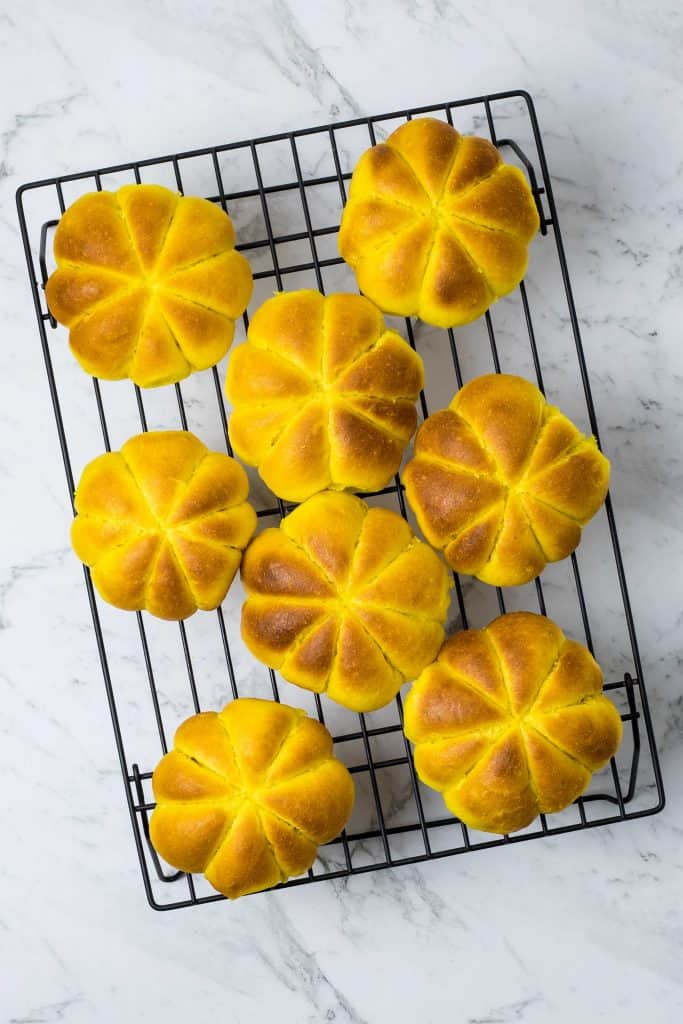
As soon as you can handle the rolls, cut the string and pull it away from each one. The cooler they get, the more the string will stick, so I try to do this as soon as they come out of the oven.
And you’re done! Congratulate yourself on your excellent baking skills and serve your rolls as a side dish with some butter, or use them to make fun lunches and snacks. I especially like pumpkin dinner rolls filled with ham or salami and salad – the saltiness of the meat offsets the slight sweetness of the rolls really well.
Your finished rolls will keep for a couple of days at room temperature or frozen for a couple of months, if they even make it to the freezer!
Happy cooking, see you here again soon.
Do you want to use and love your steam oven more?
There are precious few resources to teach us HOW to use a steam oven in everyday cooking. I’m guessing that’s why you’re here! If you love cooking but aren’t making the most of your combi steam oven, you aren’t alone.
Steam Oven Insiders was created for you!
Benefit from my decade-plus of steam oven knowledge and training, delivered to your inbox twice monthly in bite sized, easy-to-implement tips and delicious recipes you’ll actually want to cook. Insiders get access to every exclusive recipe and article within the members dashboard, so you’ll never miss a thing.
Find out more right here
Pumpkin Dinner Rolls
Ingredients
- 1 cup pumpkin puree 200g, warm but not hot; canned is ok but homemade is better
- ¼ cup sugar 60g
- 2 tsp salt
- 4 oz butter softened
- 2 eggs large
- 2 tsp dry yeast instant or active dry; I use active dry, instant may rise a little faster
- ¾ cup milk 185ml, lukewarm
- 4¼ cups white bread flour 600g; sub for part whole wheat flour if you prefer, you may need a little extra liquid
Instructions
Conventional Oven Method
- Make the dough. Put all the ingredients into a large bowl and mix by hand or with a mixer until a soft, smooth and elastic dough forms. If you’re mixing by hand this could take up to 10 minutes, in a mixer it takes around 4-5 minutes.
- Place the dough in a clean bowl, cover with a damp cloth and leave to rise in a warm place (somewhere that’s around 27°C/80°F is ideal) until doubled in size, about 90 minutes.
- Turn the dough out onto a floured surface and gently press it down to remove any large air pockets (no need to flatten it into submission here!). Divide the dough into 15 pieces and form each into a smooth roll.
- Take your string and cut 15 long pieces – I found about 24”/60cm pieces was about right. Put a little vegetable or olive oil on your fingers and run each piece of string over them to lightly grease it. Place a piece of string over the middle of a formed roll then turn it over and cross the string over like you’re wrapping a gift, and turn it back over again. Repeat this so you have 8 sections, then tie the string in a loose knot at the top and trim any excess. You don’t want to pull the string too tight when you’re wrapping it around the dough, as the dough will expand and the shape will be formed during the second prove.
- Place the rolls, spaced well apart, in a lightly greased or parchment-lined pan. Cover the pan with a damp kitchen towel and let the rolls rise until they’re puffed and the dough springs back into shape when a finger is gently pressed onto the surface, about 1-1½ hours. Towards the end of the rising time, preheat your oven to 180°C/350°F.
- Bake the rolls until they’re golden brown, 20 to 25 minutes, then remove from the oven and turn them onto a rack.
- Serve rolls warm or at room temperature. Store any leftovers in an airtight container for a couple of days at room temperature, or freeze for up to 2 months.
Combi Steam Oven Method
- Make the dough. Put all the ingredients into a large bowl and mix by hand or with a mixer until a soft, smooth and elastic dough forms. If you’re mixing by hand this could take up to 10 minutes, in a mixer it takes around 4-5 minutes.
- Place the dough in a clean bowl and use the dough proving setting in your steam oven until the dough has doubled in size, about 30-40 minutes. There’s no need to cover the bowl. If you don’t have a dough proving setting, steam setting at 35°C/95°F (100% humidity) will achieve similar results.
- Turn the dough out onto a floured surface and gently press it down to remove any large air pockets (no need to flatten it into submission here!). Divide the dough into 16 pieces and form each into a smooth roll.
- Take your string and cut 15 long pieces – I found about 24”/60cm pieces was about right. Put a little vegetable or olive oil on your fingers and run each piece of string over them to lightly grease it. Place a piece of string over the middle of a formed roll then turn it over and cross the string over like you’re wrapping a gift, and turn it back over again. Repeat this so you have 8 sections, then tie the string in a loose knot at the top and trim any excess. You don’t want to pull the string too tight when you’re wrapping it around the dough, as the dough will expand and the shape will be formed during the second prove. Repeat the string tying for each roll.
- Place the rolls in a lightly greased or parchment-lined 22cm x 32cm (9in x 13in) pan. Place the pan in your steam oven on dough proving setting again and let the rolls rise until they’re puffed and the dough springs back into shape when a finger is gently pressed onto the surface, about 25-30 minutes.
- With the pan still in the oven, change your oven temperature to 180°C/350°F, combination steam setting. If your oven has variable steam levels, select 30% humidity (if you don’t have variable steam settings, don’t worry! Just set the temperature and combination or convection steam, and the oven will work out the rest).
- Bake the rolls until they’re golden brown, about 20 minutes, then remove from the oven and turn them onto a rack. If you’d like to give them a gloss, brush each roll with the extra melted butter while hot.
- Serve rolls warm or at room temperature. Store any leftovers in an airtight container for a couple of days at room temperature, or freeze for up to 2 months.

