


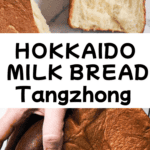


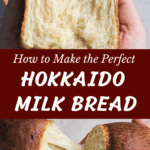

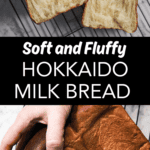

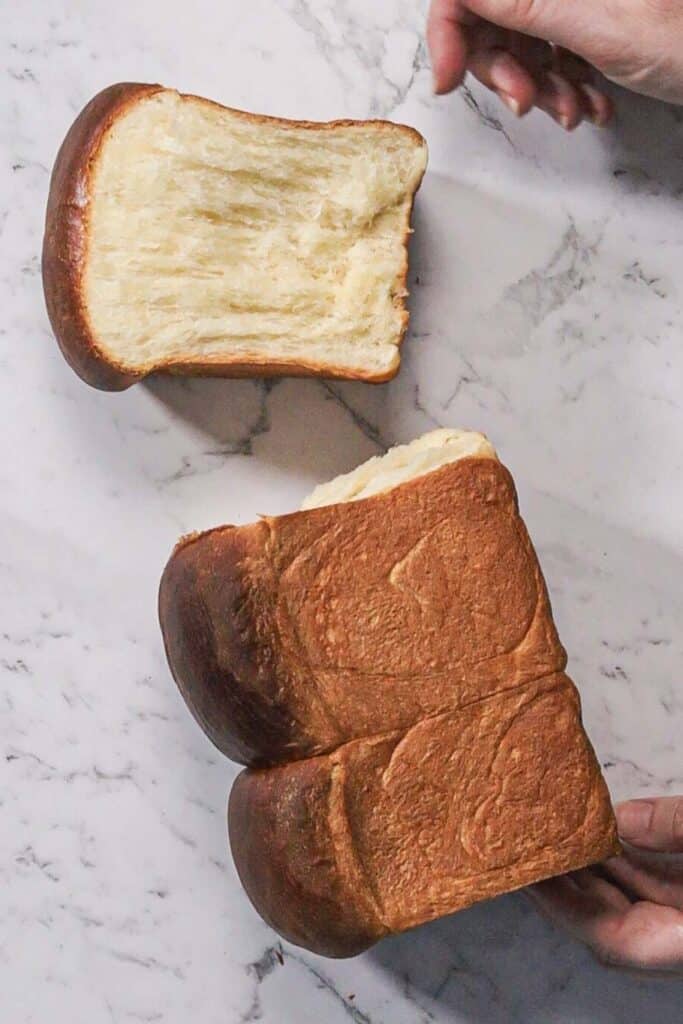
This soft and glorious Japanese milk bread recipe is also known as Hokkaido milk bread. No matter what name you use, it’s a fluffy and super tender bread that’s a joy to bake and stays fresh for days.
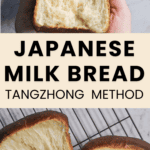
Japanese milk bread is made using the tangzhong method of cooking flour in milk, then adding this mixture to the dough for additional softness and moisture in the finished loaf.
This was my first time making Japanese milk bread, and I’m so glad I chose your recipe. It turned out amazing! The crumb was incredibly soft and pillowy, and if I hadn’t made and baked the dough myself, I would have sworn it came from a professional bakery.
Misty
I first tried making fluffy Japanese milk bread a couple of years ago. Japanese bread seemed to be all over the internet, and I wanted to know what the fuss was about!
I’ve done a lot of baking in my life, but as soon as I’d made my first loaf of this golden brown and slightly sweet bread it shot into my top 5 favorite breads to bake. I started baking loaves and Japanese milk bread rolls almost every week, much to the delight of my family.
Like some of my other favorite enriched dough recipes (think easy potato rolls, lemon buns and twisted cinnamon bread, Hokkaido milk bread makes a soft, silky dough. It’s fun to work with and bakes perfectly in either a regular oven or a steam oven. This post will help you get the best results when baking your own Japanese milk bread.
Why you’ll love this recipe
- Japanese milk bread, or Hokkaido milk bread, is straightforward to make and comes out pillowy soft.
- This fluffy white bread is enjoyed in Japan as a sandwich loaf, but it’s so versatile! You’ll be eating fresh, warm slices cut straight from the loaf, and it makes the best toasted sandwiches and French toast I’ve ever tried.
Why does this Japanese milk bread recipe work well in a steam oven?
Japanese milk bread is perfect for baking in a steam oven because the added humidity keeps the crumb very tender, and the crust golden but not too thick and crusty.
As an Amazon affiliate I earn from qualifying purchases. This post may also contain other affiliate links, which means I may earn a commission if you click through and make a purchase, at no additional cost to you.
What is the tangzhong method and why is it necessary in milk bread?

- The tangzhong technique is originally a Chinese method, not a Japanese one. It involves cooking a small portion of flour and liquid (usually water or milk, or both) until it becomes a smooth, thick paste. This gluey paste is cooled and mixed in with the bread dough. The method was made popular by Taiwanese cook Yvonne Chen, in her book 65°C Bread Doctor.
- Tangzhong bread works like this: heat and liquid make the starch molecules in the cooked flour swell and bond together. This creates a gel-like structure that can trap and hold water. The heat is really important here. Starch molecules absorb liquid whatever its temperature, but they’ll absorb more if that liquid is hot than if it’s cold. When this gelatinized mixture is added to dough, it provides moisture without making it difficult to handle Thus, pillowy bread that has a super soft texture and stays fresh for longer.
- Tangzhong is similar to the yudane method, however yudane relies on just mixing boiling water with flour and letting it sit overnight for gelatinization to occur. Tangzhong milk bread offers the more ‘instant gratification’ approach, so that’s what I prefer to use.
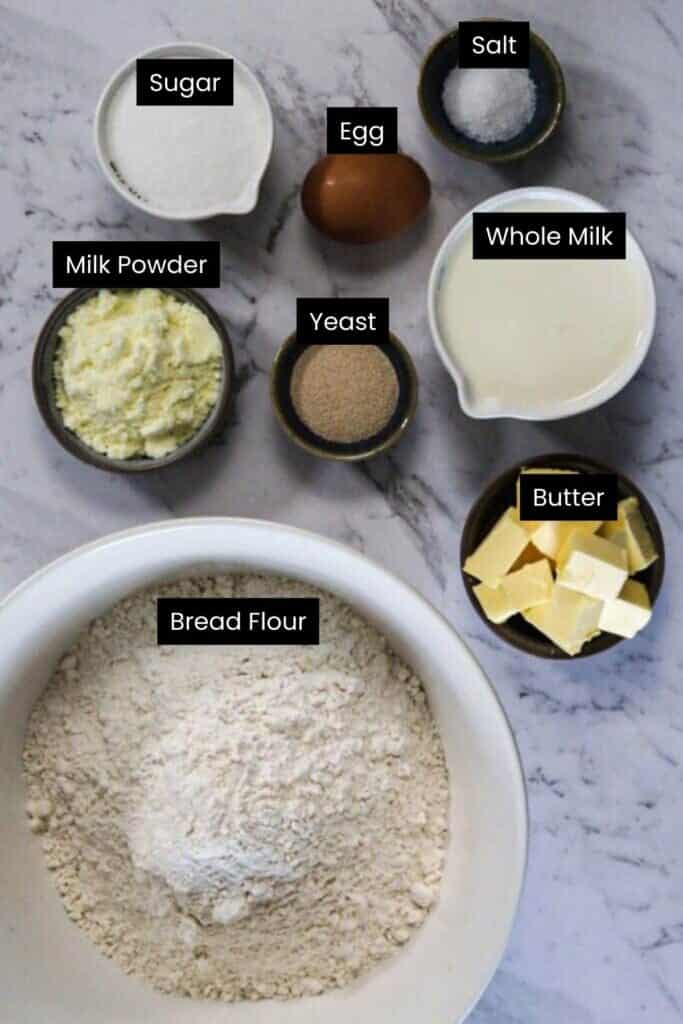
Ingredients and substitutions
See the recipe card further down for full method and ingredient quantities. Key ingredients and notes are listed here.
- Milk powder: Adding milk powder as well as whole milk to your Japanese bread results in a soft texture that you won’t get with whole milk alone. If you don’t have milk powder you can go without it, however your Japanese milk bread won’t be as soft and rich.
- Softened butter: when you’re mixing the dough and adding butter, it needs to be soft enough to easily mix into the other ingredients. If it’s straight from the fridge it’ll never mix in.
- Yeast: I use active dry yeast for my milk bread, with excellent results. I’ve also used instant yeast with success. Because Japanese milk bread dough has a relatively short rise time and plenty of food for the yeast in the form of sugar and milk, you can use the two types interchangeably without sacrificing bread quality.
How to make Japanese milk bread
View, save and print the recipe card further down in this post; read on for the visual walk-through.


Tips for success
Stand mixer: there is no way I’d make any enriched bread without my stand mixer and dough hook attachment. Japanese milk bread has a very sticky dough and needs a lot of butter worked into it, particularly in the early stages of mixing and kneading. Although the final dough is lovely to handle, I wouldn’t mix it by hand as it takes forever before it’ll pass the windowpane test*.
The dough rise: this is a dough that loves a nice warm place to proof. If you have a steam oven or dough proofing machine use that (directions in the recipe). A regular oven with the light switched on and the door closed is another option. Otherwise, cover the dough and put it in a place that’s got a fairly consistent temperature of 75-80°F/24-27°C.
Loaf pan: the pan or bread tin you use makes a difference to your baked milk bread. I use a deep loaf pan (9x4x4.5″), so the bread can rise and dome without overflowing the pan. A shallower pan will give you a more puffed, muffin-top look to your bread. You can also bake this in a covered pullman pan if you want a very even rectangular loaf. If you go the pullman pan route, skip brushing the risen dough with milk before baking.
Baking: I have baked this Japanese milk bread in a regular oven and a combi steam oven. Both yield really great results but the combi steam oven has the edge on forming a thinner crust that softens nicely when the bread cools.
*never heard of the windowpane test? This involves gently stretching a small piece of dough to check its elasticity. If the dough can be stretched thin enough to resemble a translucent windowpane without tearing, it indicates proper gluten development, which means good stretch and chew in the finished bread.
Japanese milk bread serving suggestions
Hokkaido milk bread makes the most amazing French toast sandwiches. But really, you can use it for anything you need a fluffy, white bread for. Thickly sliced, buttered and eaten standing by the bench? Yep. Toasted and slathered with jam? Also yes. Soft, nostalgic white-bread sandwiches? You got it.
I can’t wait for you to try my fluffy Japanese milk bread recipe, and I hope you love it as much as we do here. Happy baking and I’ll see you here again soon.
Spread the word
If you’ve made and enjoyed this recipe (or any others on the site!), would you leave a review and rating? Reviews are incredibly helpful to other cooks, and help me understand the sorts of content you enjoy or questions you have. You can rate and review any recipe by clicking the star icons at the top of the recipe card.

Japanese Milk Bread (Hokkaido Milk Bread)
Ingredients
Roux/Starter
- 1/4 cup bread flour
- 1/4 cup whole milk
- 1/4 cup water
Dough
- 2 1/2 cups bread flour
- 1/4 cup granulated sugar
- 2 tsp active dry yeast or instant yeast (no modification necessary for mixing)
- 2 Tbsp dry milk powder full fat/whole milk powder
- 1 tsp fine salt
- 1/2 cup milk room temperature
- 1 egg lightly beaten
- 1/4 cup unsalted butter softened
- 2 Tbsp whole milk for brushing
Instructions
Cook the roux/starter
- Combine the ingredients for the roux/starter in a small saucepan over medium heat. Stir continuously as the mixture heats and then thickens to the consistency of mashed potatoes. This will take about 5 minutes. Transfer to a bowl and cover, letting the mixture sit until it gets to room temperature.1/4 cup bread flour, 1/4 cup whole milk, 1/4 cup water
Make the dough
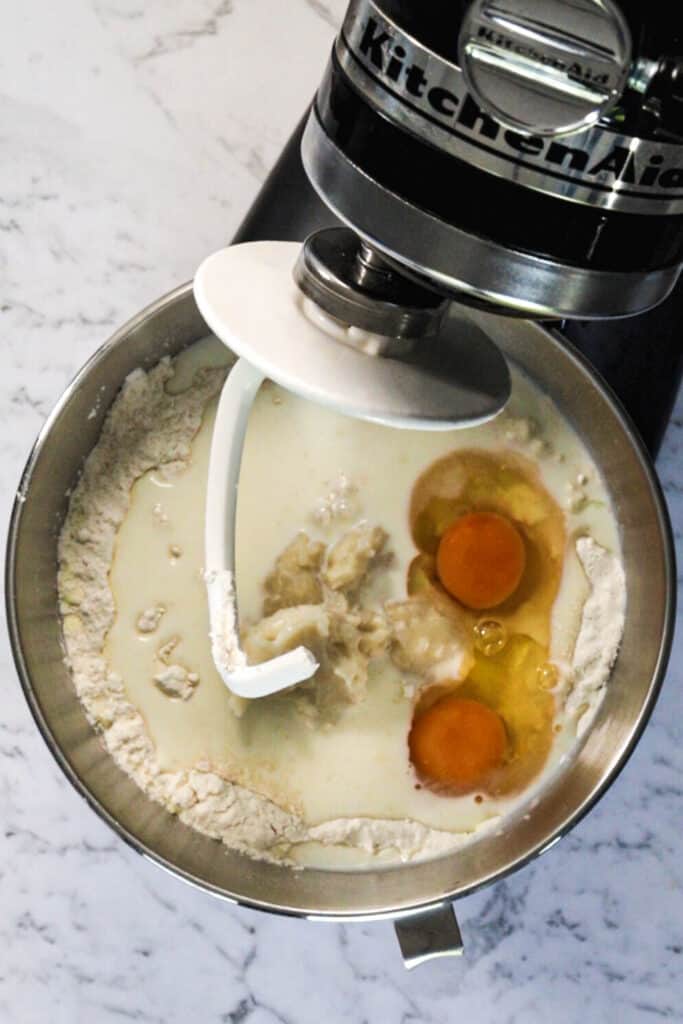
- Put the bread flour, sugar, yeast, dry milk powder, and salt into the bowl of a stand mixer fitted with a dough hook. Mix the dry ingredients briefly to combine, then add milk, cooled roux/starter, and beaten egg.2 1/2 cups bread flour, 1/4 cup granulated sugar, 2 tsp active dry yeast, 2 Tbsp dry milk powder, 1 tsp fine salt, 1/2 cup milk, 1 egg
- Mix on low for 5 minutes until a shaggy dough forms. With the mixer running, drop in the cubes of butter, one by one, and continue mixing for 5 minutes. Turn the speed up to medium and mix until the dough is elastic, smooth and soft, about 5 minutes. Transfer the dough to a lightly oiled bowl.1/4 cup unsalted butter
First proof
- For benchtop proving, cover the bowl and let the dough sit at warm room temperature (75-80°F/24-27°C is ideal), until it has doubled in size, about 1-1 1/2 hours.
- If you're using a steam oven for proving, set the oven to 85°F/30°C, 80% humidity. Put the uncovered bowl in the oven until it's doubled in size, about 40 minutes.
Shape the loaf
- Transfer dough onto a lightly floured surface and divide into 3 equally sized pieces. Roll each out into a rectangle about 1/4 inch/7mm thick. Fold the long sides of each piece of dough in about 1" towards the center. Starting on one of the short edges, tightly and neatly roll up the dough and place in a greased 9×4 inch (23x10cm) loaf pan. Repeat with each piece of dough so you've got three little 'snails' lined up in your loaf pan.
Second proof
- For benchtop proving, cover the pan and let rise until the dough springs back when gently pressed with a fingertip, about 45 minutes.
- For steam oven proving, set the oven to 85°F/30°C, 80% humidity. Put the uncovered pan in the oven until the dough springs back when gently pressed with a fingertip, about 25 minutes. Remove from the oven while you preheat for baking.
Bake the loaf – regular oven
- Shortly before you're ready to bake, preheat oven to 350°F/180°C. Brush the top of the risen loaf with milk and bake for 35-40 minutes or until the top is a deep golden brown. If you'd like to bake to temperature, the inside of the loaf should read 190°F/88°C on an instant read thermometer.2 Tbsp whole milk
Bake the loaf – steam oven
- Preheat oven to Combi Steam, 350°F/180°C. If your oven has variable steam settings, set to 60% steam (if not, don't worry! Just set to combi steam/convection steam at the correct temperature and the oven will work out the humidity). Brush the top of the risen loaf with milk and bake until the top is a deep golden brown, about 30-35 minutes. If you'd like to bake to temperature, the inside of the loaf should read 190°F/88°C on an instant read thermometer.2 Tbsp whole milk
- Remove from oven and let the loaf sit for 5 minutes before removing it from the pan to a cooling rack. Let it cool to barely warm before slicing. Any bread not eaten on the first day will keep, well wrapped, for a couple of days at room temperature. Alternatively, slice and freeze, well wrapped, for up to 2 months.
Notes
- You can skip the milk powder in this recipe if you don’t have any, however it will make a difference to the softness and richness of the finished loaf.
- I use a deep loaf pan for this bread (9x4x4.5″), so it can rise and dome on top without overflowing the pan. A shallower pan will give you a more puffed, muffin-top look to your bread. You can also bake this in a covered pullman pan if you want a very even rectangular loaf. If you do this, skip brushing the risen dough with milk before baking.
- Leftover/stale Hokkaido Milk Bread makes excellent French toast and toasted sandwiches.


12 Responses
I’m so glad you enjoyed the recipe! It’s definitely still one of my favorite breads of all time.
This was my first time making milk bread, and I’m so glad I chose your Hokkaido Milk Bread recipe. It turned out amazing! The crumb was incredibly soft and pillowy, and if I hadn’t made and baked the dough myself, I would have sworn it came from a professional bakery. I’ll definitely be making this again and again, both as loaves and dinner rolls.
The only change I made was using the given metric measurements instead of US customary, and it worked perfectly. Such a great recipe!
The texture is just what I’m looking for—soft, fluffy, and oh-so-delicious. I love that you broke down the recipe step-by-step, making it approachable even for beginners. I’m excited to try this and experience that melt-in-your-mouth goodness. Thanks for sharing such an amazing and easy-to-follow recipe.
Lovely and soft but a bit sweet. The tangzhong gives a pleasant ‘bite’ to the texture.
We used it for French toast rather than sandwiches because of the sweetness which reminds me strongly of brioche.
Remarkable bread! Thanks for the recipe!
For a pullman pan version I’d go with a 13x4x4 inch pan. That should give enough room within the pan for the rise.
What size Pullman loaf pan should I use?
Everyone loved this bread. Easy to make and great taste. Will make again for sure.
I’m not sure this particular recipe will work as a gluten free loaf. The gluten is really necessary to provide a good ‘stretch’ and form to the bread and I’m not sure it would be the same without it.
Yes, I do in this recipe. It helps the crust stay relatively thin and soft.
Question – Do you set the Combi-steam oven at 60% humidity for the full amount of time that the loaf bakes?
Do you have a gluten free variety?