These Crème Brûlée Cheesecake Bars combine everything you love about silky cheesecake with the crackly caramel top of a classic crème brûlée. They’re decadent yet simple, with a buttery graham cracker base (or use digestives, if you’re in Aus or the UK!), a creamy steam-set filling, and that irresistible shattering sugar crust to finish.
If you want a dessert that looks impressive and can be served in a multitude of ways, these cheesecake bars are absolutely worth adding to your repertoire.
Why you’ll love Crème Brûlée Cheesecake Bars
- If you’re a fan of custardy desserts or creamy cheesecakes, these bars bring the best of both worlds together. The low temperature steam cooking keeps the filling unbelievably smooth and evenly set, meaning you get restaurant-worthy results without fussing with a water bath.
- The bars can be cut into small, elegant portions for a dinner party or larger bars for a crowd, and the caramelized sugar top adds both texture and drama. Best of all, they’re make-ahead friendly, so you can do the heavy lifting hours (or even days) before serving.
Why does this recipe work well in a steam oven?
Crème Brûlée Cheesecake Bars are perfect steam oven fare. The crumb base is baked in a dry oven just to set it, so it doesn’t get too soft when the filling gets added. Then the whole thing is steamed at low temperature to set the filling perfectly from edge to edge. There are no grainy or hard edge pieces, just a uniformly creamy and silky dessert everyone will love.
As an Amazon affiliate I earn from qualifying purchases. This post may also contain other affiliate links, which means I may earn a commission if you click through and make a purchase, at no additional cost to you.
Ingredients and substitutions
See the recipe card further down for full method and ingredient quantities for these Crème Brûlée Cheesecake Bars.
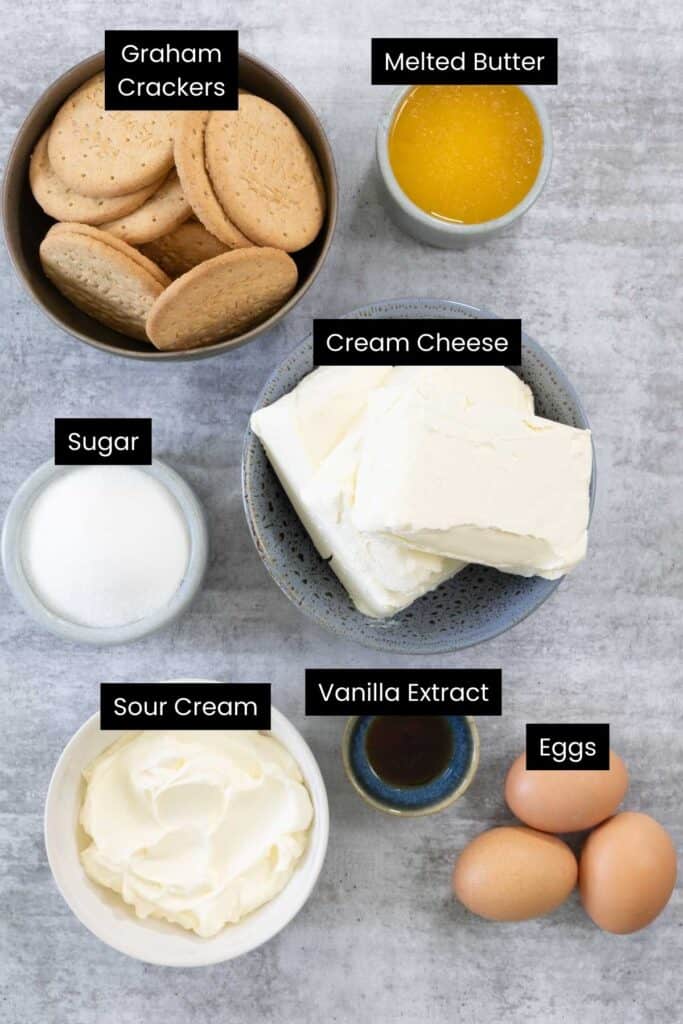
- Graham crackers or digestive biscuits: Either works well for the crumb base; choose what’s easily available or what you prefer for flavor.
- Fine salt: Just a pinch helps balance the richness of the crust and filling.
- Unsalted butter (melted): Binds the crumbs and creates that classic buttery base. Salted butter can be used if that’s all you have—just omit the added salt.
- Cream cheese (full fat, room temperature): Essential for a creamy, smooth filling. Avoid low-fat versions, which can cause the mixture to split or bake unevenly.
- Granulated (caster) sugar: Sweetens the filling and is used again for caramelizing the tops. Caster sugar dissolves more easily, but either works.
- Eggs (room temperature): Give structure and richness. Room temperature eggs blend more evenly into the filling.
- Sour cream (full fat, room temperature): Adds tang and keeps the cheesecake tender. Greek yogurt can be substituted in a pinch, but the end texture will be less silky.
- Vanilla extract or paste: Use whichever you prefer—paste adds little flecks of vanilla and a deeper flavor.
- Extra sugar for caramelizing: Granulated or caster sugar both caramelize beautifully. A kitchen blowtorch gives the most even results, though a broiler can work with careful attention.
Variations
Once you’ve mastered these bars, try a few tweaks to change up the flavor profile.
- Add the seeds of half a vanilla bean to the filling for a more intense vanilla note.
- A tablespoon of lemon zest in the mixture adds brightness.
- Make a white chocolate version by swapping a quarter of the cream cheese for melted white chocolate.
- Turn the bars into pumpkin spice cheesecake by adding 2 tsp of pumpkin spice mix, blended into the filling.
- For the base, crushed chocolate cookies or speculaas will give you a different spin on the dessert.
How to make Crème Brûlée Cheesecake Bars
View, save and print the recipe card further down in this post; read on for the visual walk-through.
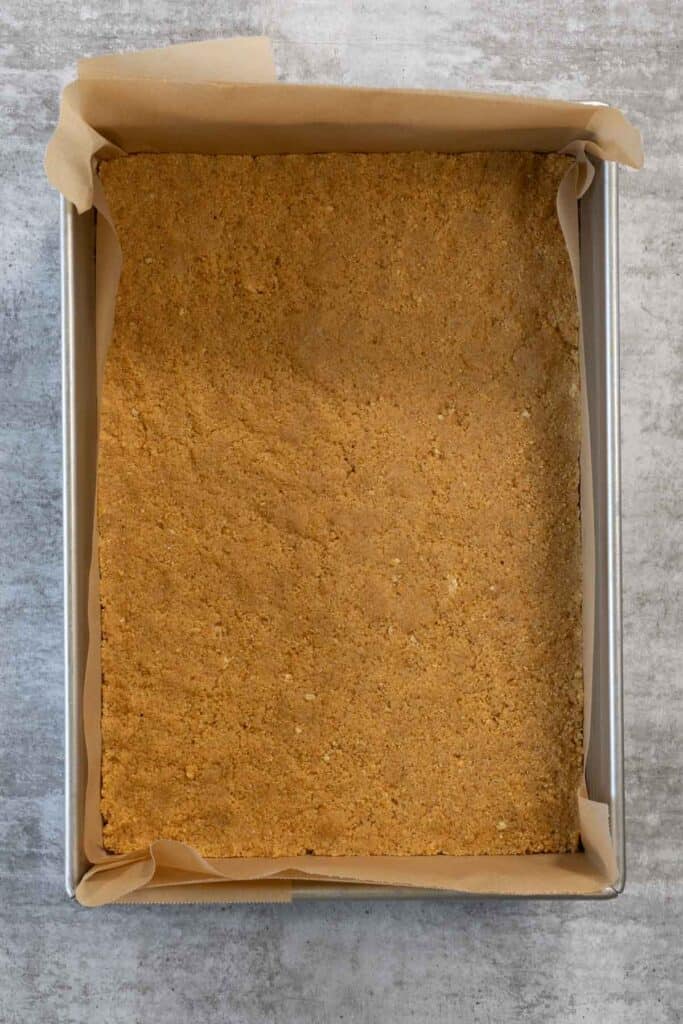
Preheat your oven to 350°F/180°C (no steam). Line a 9×13 inch (23x33cm) rectangular pan with a double layer of silicone paper or foil, greasing the foil if that’s your choice.
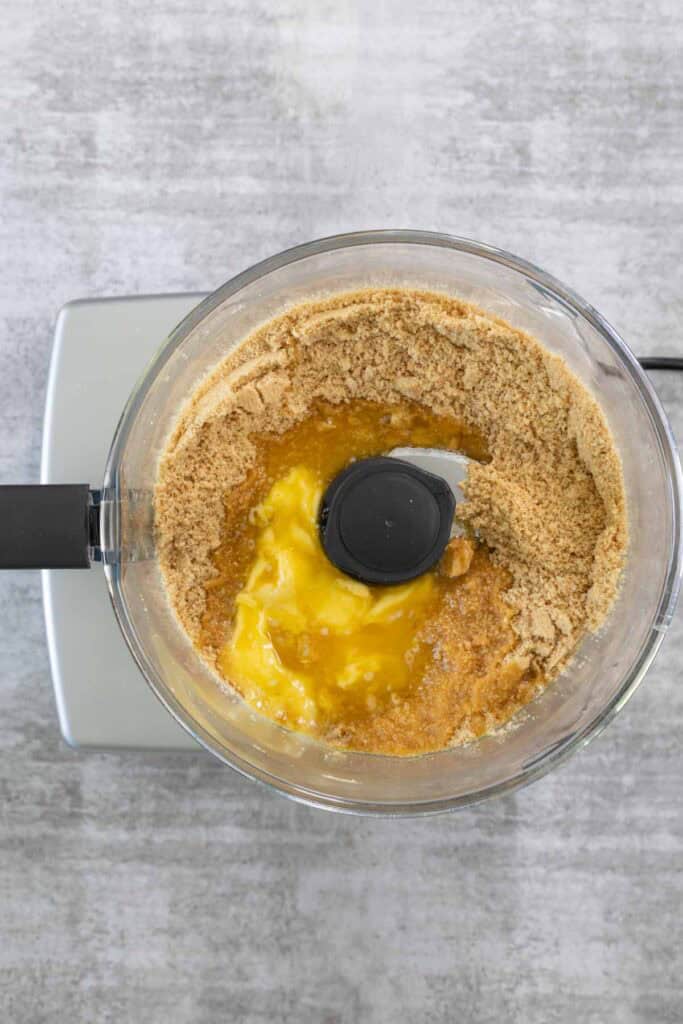
Blitz the graham crackers/digestives into fine crumbs, then pulse in the salt and melted butter. Press the crumbs firmly into the pan to create an even layer.
Once the oven has cooled, set it to Steam, 195°F/90°C (100% humidity).
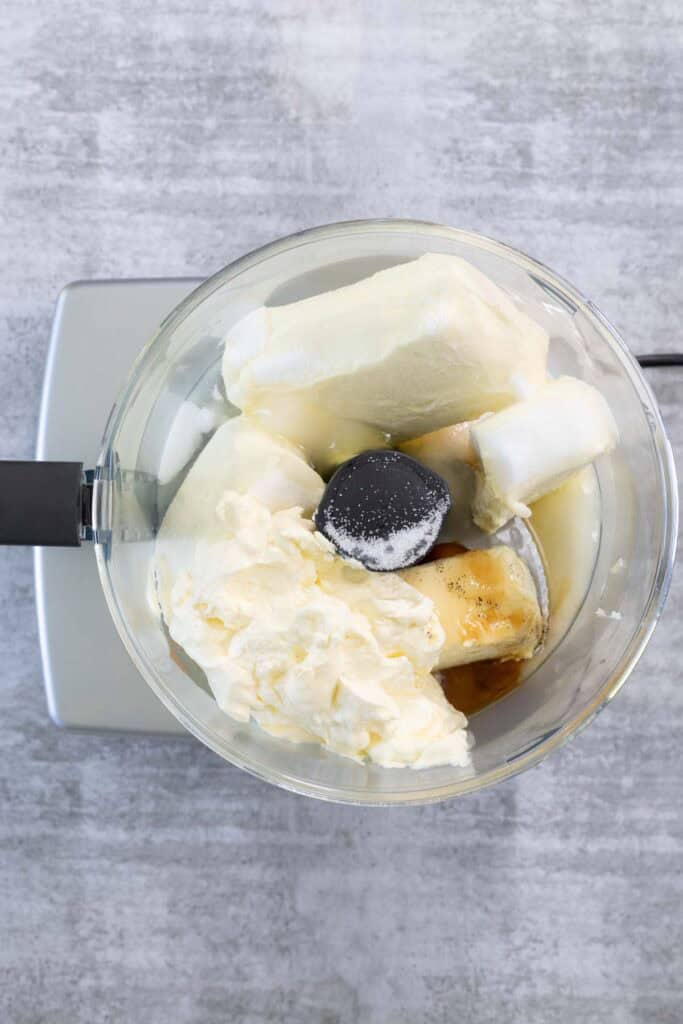
Rinse the food processor bowl, then add the cream cheese, sugar, eggs, sour cream and vanilla. Blend until smooth.
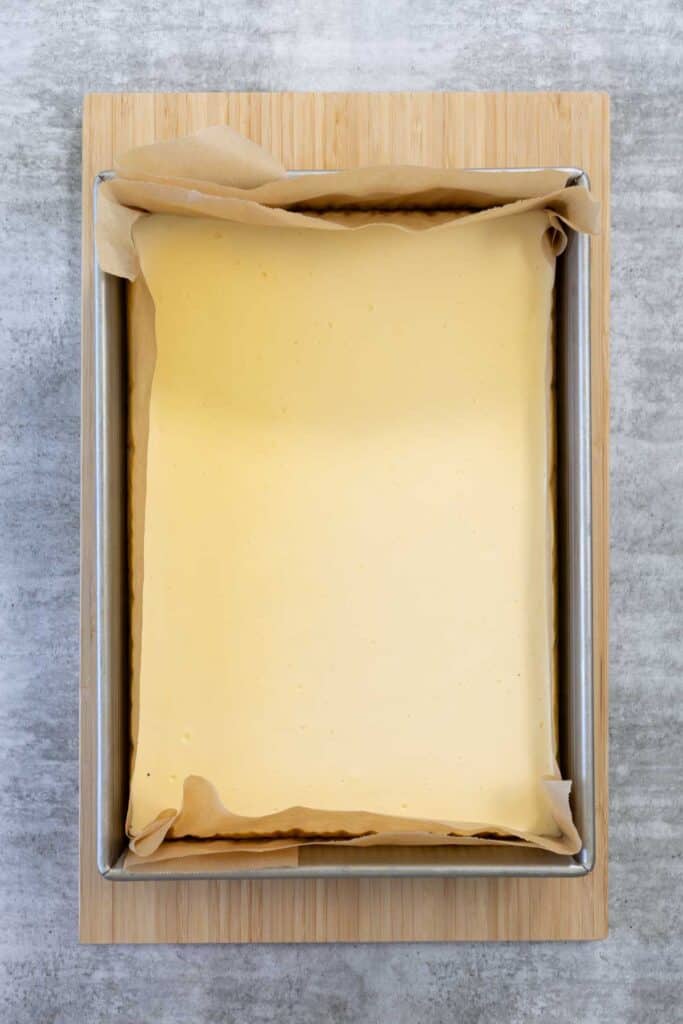
Turn off the oven, leave the door ajar, and let the cheesecake cool inside for 1 hour. Transfer to the fridge and chill for at least 3 hours.
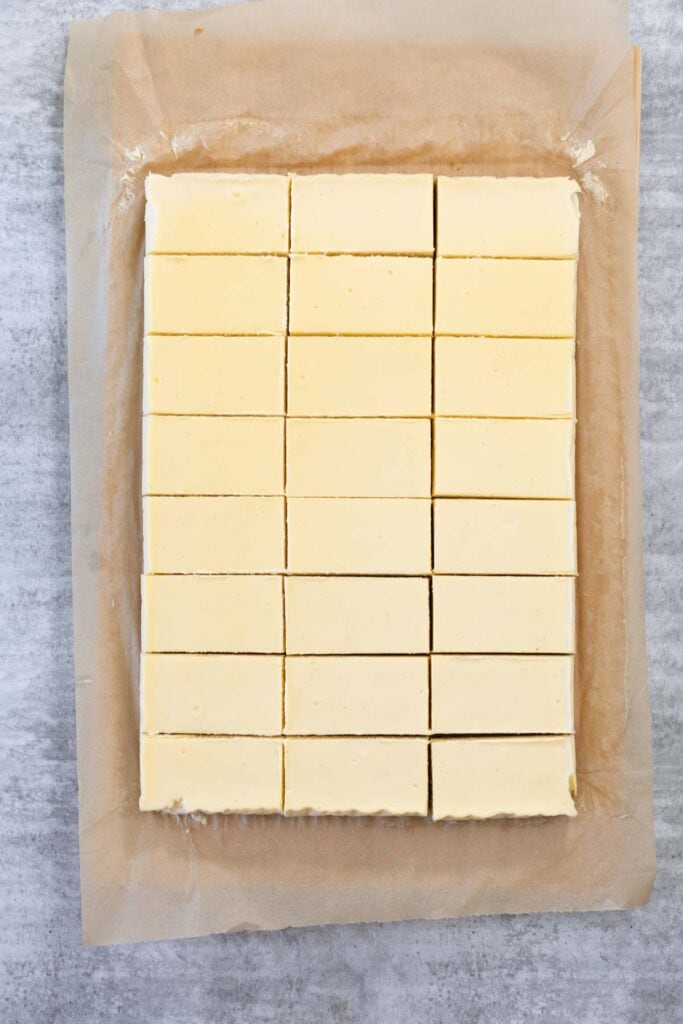
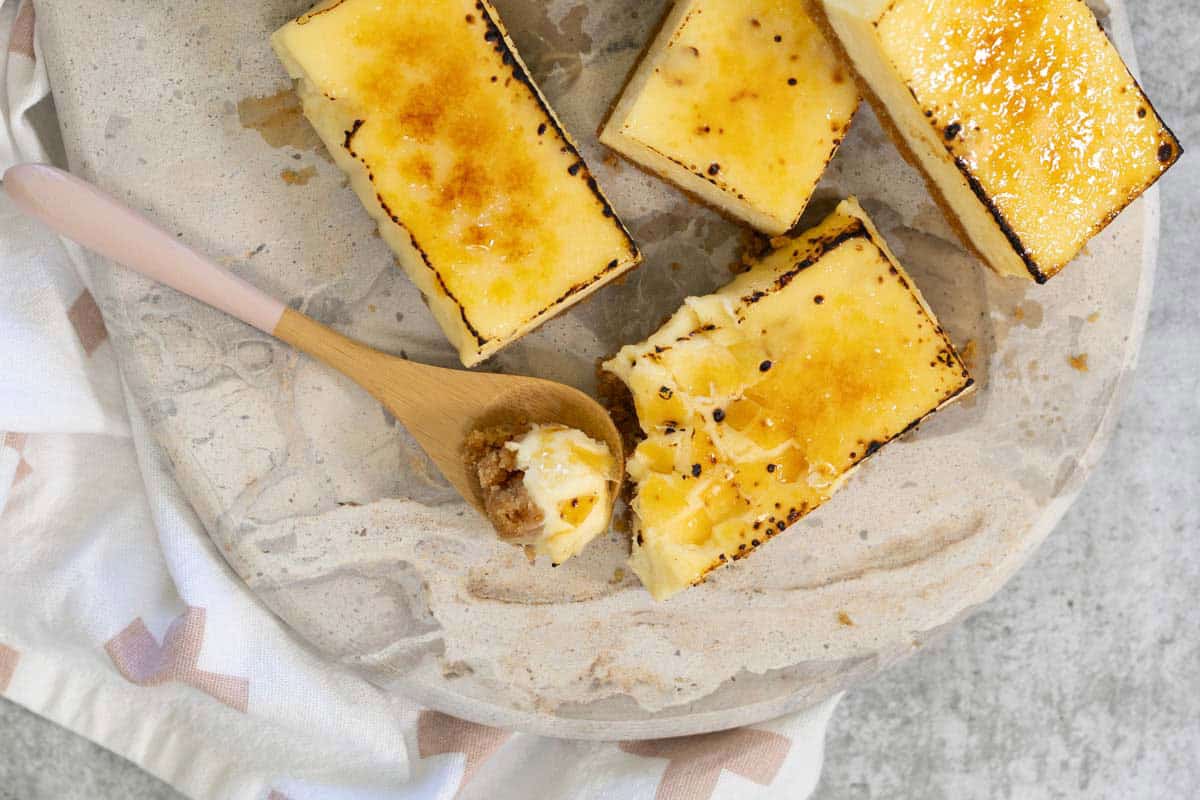
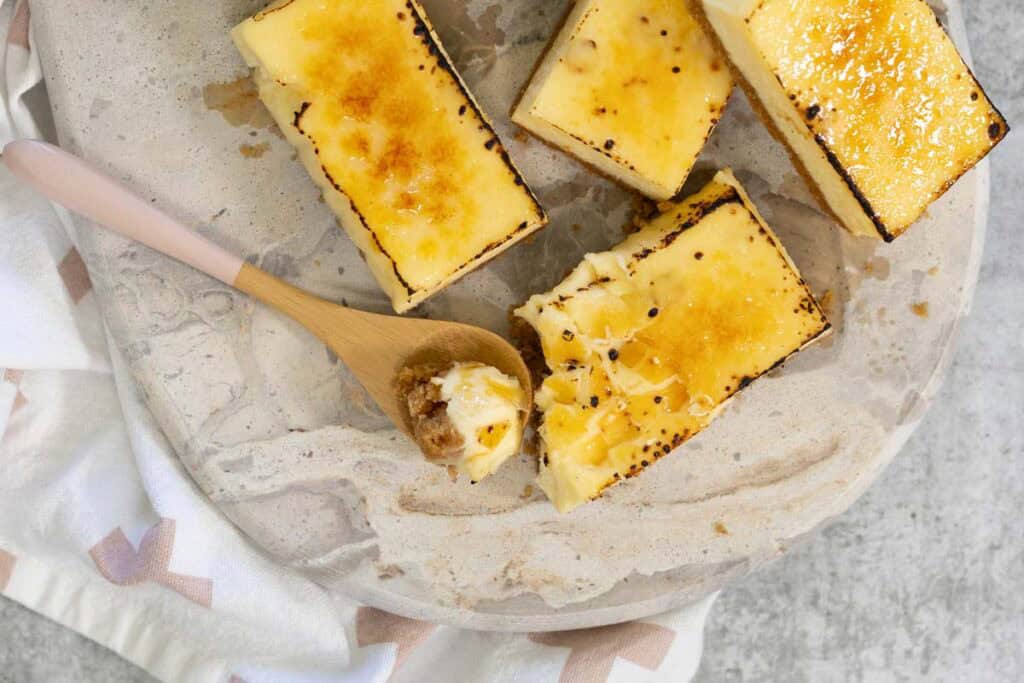
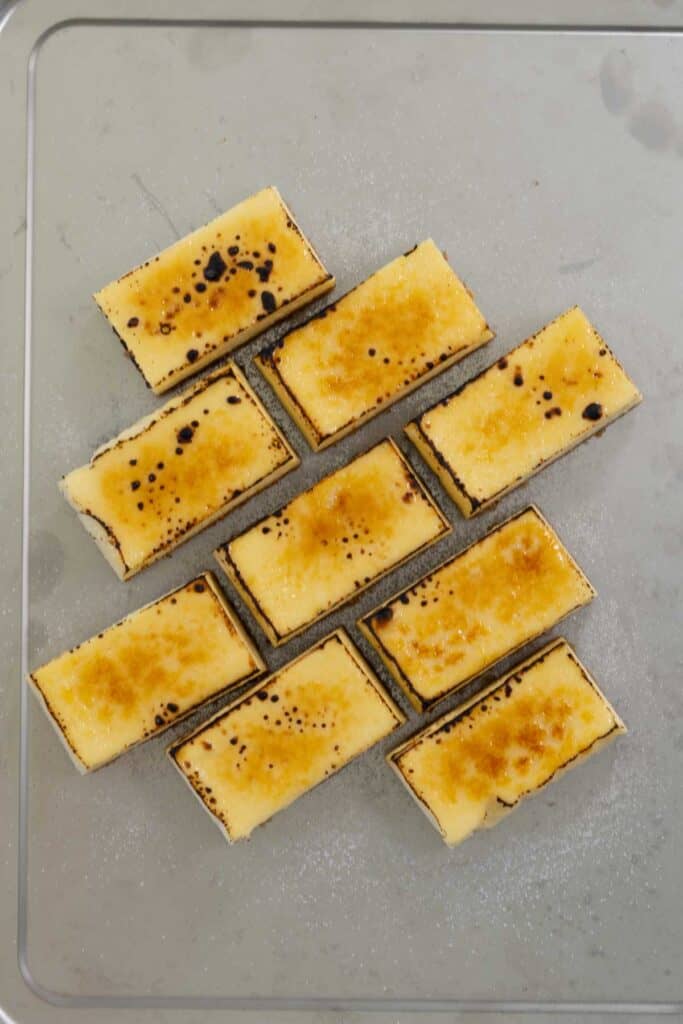
Slice the chilled cheesecake into bars—about 3 x 1.5 inches (7.5 x 4cm) makes 24 neat pieces. Dip your knife in hot water between cuts for clean edges.
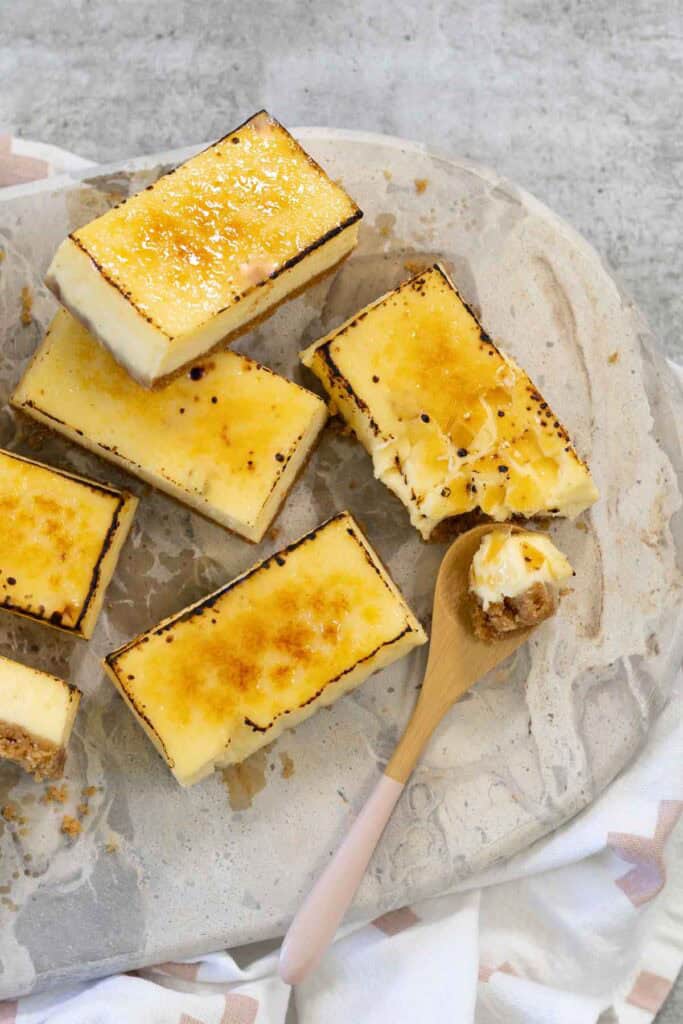
To serve, arrange the bars on a large platter for people to help themselves, as I’ve done here. Or plate them individually with a little bit of creme fraiche or whipped cream, and fresh fruit.
Tips for success
For the smoothest filling, make sure all your dairy ingredients are at room temperature before blending. When baking with steam, resist the urge to rush the cooling time—allowing the cheesecake to sit in the oven as it cools helps prevent cracks and keeps the filling beautifully creamy. If you’re caramelizing the sugar ahead of time, keep in mind that it will soften in the fridge; it’s always best to torch just before serving. And for the neatest slices, fully chilled bars and a hot, clean knife are essential.
Serving and storage suggestions
Short sentence leading into list. Try to include links to other relevant recipes for serving with.
- These bars are perfect for entertaining because they’re rich enough to serve in small portions while still feeling special. Cut them into triangles for a more elegant presentation.
- The bars travel well if kept cold, so they’re ideal for taking to gatherings—just pack the blowtorch and sugar separately for caramelizing on arrival.
- Unglazed bars can be frozen for several weeks; layer them with silicone paper, keep the container airtight, and avoid stacking more than three layers. Thaw overnight in the fridge, then caramelize the tops to serve.
These Crème Brûlée Cheesecake Bars are the kind of dessert that looks like you put in far more effort than you actually did. The steam oven ensures perfectly cooked cheesecake without cracks or stress, and the caramelized sugar crust adds the signature crème brûlée flair. Whether you’re hosting a dinner party, bringing a plate to a celebration, or craving something sweet and a little bit fancy, this recipe will not let you down.
Spread the word
If you’ve made and enjoyed this recipe (or any others on the site!), would you leave a review and rating? Reviews are incredibly helpful to other cooks, and help me understand the sorts of content you enjoy or questions you have. You can rate and review any recipe by clicking the star icons at the top of the recipe card.
Creme Brulee Cheesecake Bars
Ingredients
- 9 oz graham crackers or digestive biscuits
- 1/4 tsp fine salt
- 3/4 cup unsalted butter melted
- 24 oz cream cheese 3 bricks, full fat, at room temperature
- 3/4 cup granulated sugar caster sugar
- 3 eggs large, at room temperature
- 3/4 cup sour cream full fat, at room temperature
- 2 tsp vanilla extract or paste
- 1/2 cup granulated sugar caster sugar, extra, for torching the top of the cheesecake
Instructions
Make the base
- Preheat oven to 350°F/180°C (no steam). Line a 9×13" (23x33cm) rectangular pan with a double layer of silicone paper or foil. If using foil, grease the foil well. Set aside.
- Roughly break up the graham crackers/digestives into the bowl of a food processor. Process to make fine crumbs, then add the salt and melted butter and pulse to combine well.9 oz graham crackers, 1/4 tsp fine salt, 3/4 cup unsalted butter
- Tip the crumb mixture into the lined pan and press down well to make an even layer across the base of the pan. Put into the preheated oven and cook for 12 minutes. The base should be firm and lightly golden. Turn the oven off and leave it open to cool down. Set the base aside to cool while you make the filling.
Make the filling
- As soon as the oven has cooled down, turn it back on and set to Steam, 195°F/90°C (100% humidity).
- Rinse the processor bowl. Put the cream cheese, sugar, eggs, sour cream and vanilla into the bowl and process until smooth. Pour the mixture over the cooled base and smooth the surface.24 oz cream cheese, 3/4 cup granulated sugar, 3 eggs, 3/4 cup sour cream, 2 tsp vanilla extract
- Cook the cheesecake for 1 hour, by which time the filling should be set. Turn off the oven and leave the door ajar with the cheesecake inside for an hour to cool. Then move the cheesecake to the fridge to chill for at least 3 hours. It needs to be completely cold before you slice and caramelize it.
Caramelize the top
- When the cheesecake is cold, slice it unto bars with a knife dipped in hot water between each cut. My bars are approximately 3×1.5 inches (7.5x4cm), to make 24 bars from one pan. You can cut yours larger or smaller as you like.
- When you're ready to serve, sprinkle the extra sugar evenly over the tops of the bars, then use a kitchen blowtorch to melt and caramelize the sugar. Serve within a couple of hours to prevent the sugar going soft.1/2 cup granulated sugar
Notes
- These little bars are an excellent dessert after a big meal. They’re rich and decadent, but can be cut into tiny portions so they aren’t overly filling. Try cutting each rectangle in half for pretty triangles to plate up; I like to serve them with a little dot of creme fraiche and a fresh berry or two.
- If you can keep them cold, the bars are sturdy enough to travel well. I’d take the blowtorch and extra sugar to wherever you’re going, then caramelize the tops just before serving.
- The cut, un-caramelized bars will freeze well for several weeks. Put layers of silicone paper in between, seal in an airtight container and don’t stack them more than 3 layers high for the best results. Thaw overnight in the fridge and caramelize to serve.


2 Responses
I found I did not need to cover these; I think due to the shorter cooking time they don’t end up getting wet on top. I think the results will be similar either way if you’re concerned about water on top, though!
Hi Emily,
These bars were delicious and not too sweet. I just have one question, am I supposed to cover them with foil when baking like recommended in your other cheesecake recipes? I did cover them just in case. Thanks, Susan