
These chocolate and peanut butter brownies are dark, fudgy and full of toasty flavor thanks to the inclusion of burnt butter. They’re topped with a creamy-soft, salted peanut butter frosting. They bake beautifully in either a regular oven or a steam oven, and I’ve included methods for both in the recipe below.
Love this recipe and so does my whole family!
-Renee
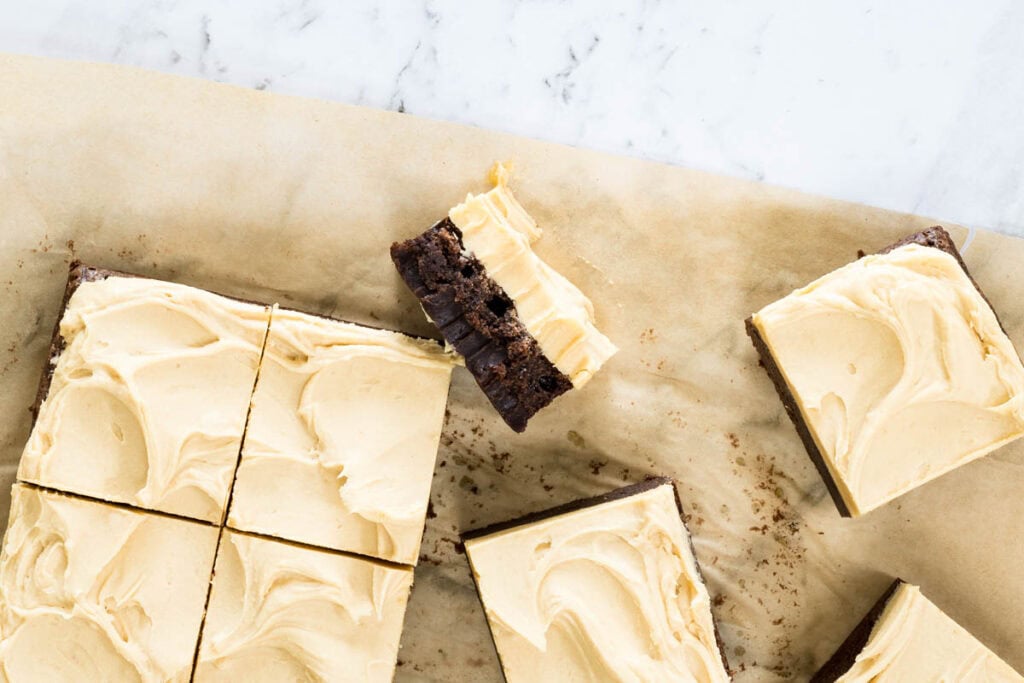
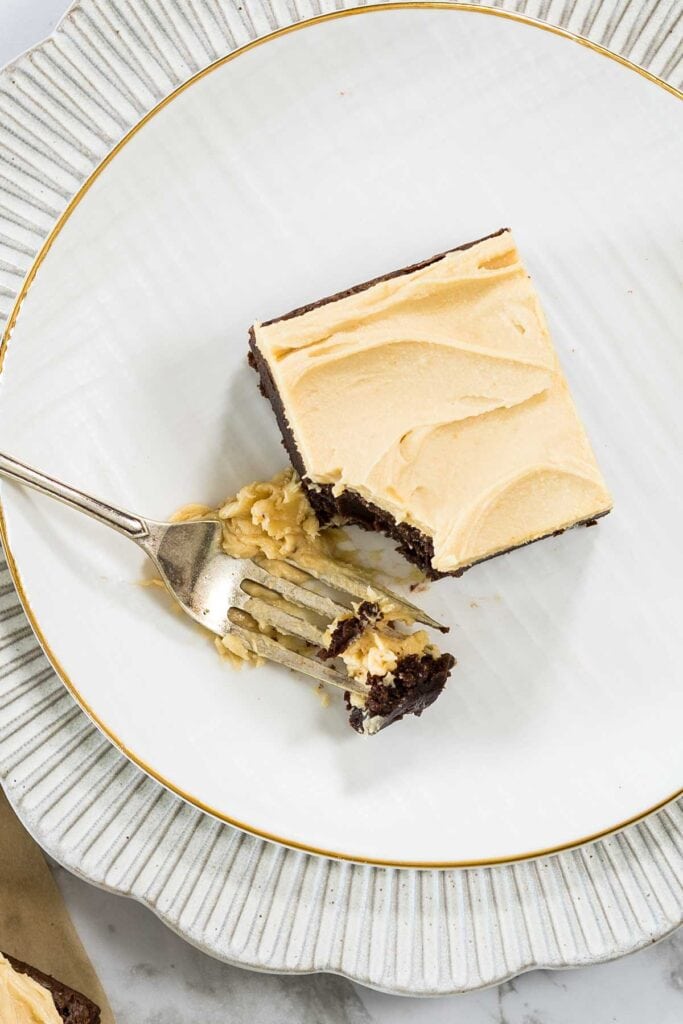
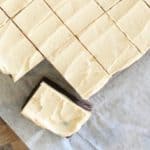
I LOVE these brownies, and I’ve been making them for years. The brownies themselves are deep, dark and complex from the browned butter plus a combination of both chocolate and cocoa powder. The frosting is super creamy, peanut-butter-laden and sweet, with a hefty dose of salt flakes which tie everything together (if you haven’t been converted to the trend for salt-in-sweet, I’m not sure we can be friends). It seems at first glance as though there’s too much frosting for the brownies, but the balance is strangely just right.
As an Amazon affiliate I earn from qualifying purchases. This post may also contain other affiliate links, which means I may earn a commission if you click through and make a purchase, at no additional cost to you.
Why do these chocolate and peanut butter brownies recipe work well in a steam oven?
Added humidity keeps the brownies moist and fudgy, and you get that beautiful density from edge to edge (no dry corner pieces!). Plus, a shorter bake time than in a regular oven makes these achievable for a last-minute dessert.
Ingredients and substitutions
See the recipe card further down for the full method and ingredient quantities for these chocolate and peanut butter brownies.
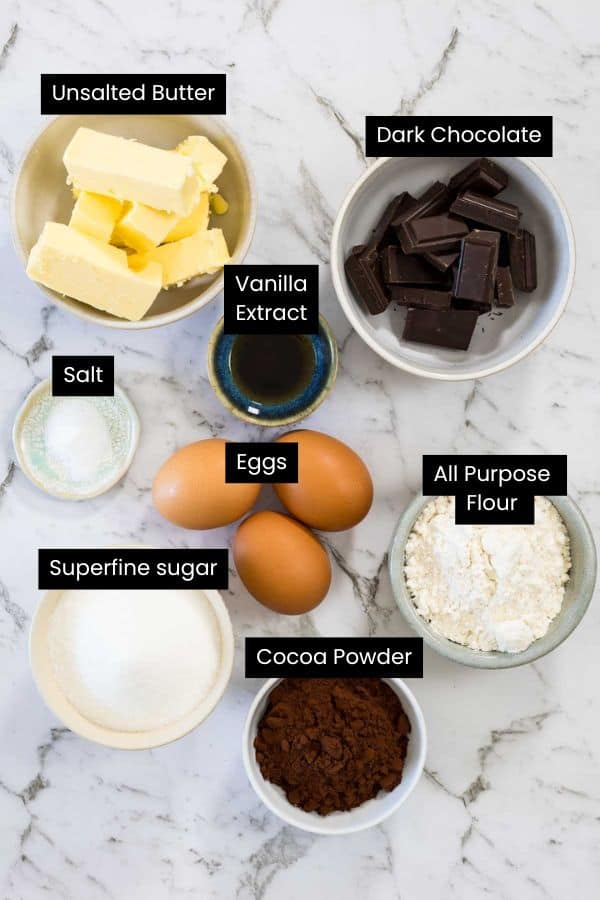
- Browned (burnt) butter: this is the critical element to achieve a toasty richness and depth of flavor in the finished brownies; if you’ve never used brown butter before you are in for a treat here.
- Base: dark chocolate, Dutch process cocoa, sugar, eggs, flour and salt – where many brownies use cocoa OR chocolate, in this recipe we reach for both for maximum chocolate flavor. Dutch processed cocoa is alkalized, which makes it smoother and less bitter than regular cocoa powder; it’s my preference in most baked goods.
- Flour: use all-purpose (plain) flour for classic texture. Or try almond meal as a gluten free option (the brownie texture will be a little softer and might need an extra couple of minutes in the oven).
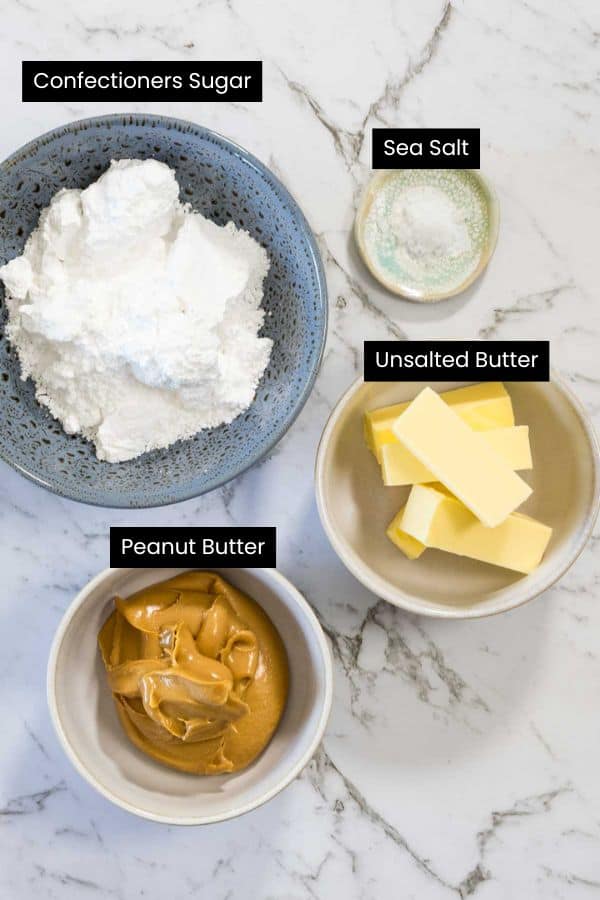
- Peanut butter frosting: the best results come from smooth, ‘regular’ peanut butter (not natural/oil-separated) so it whips up light and creamy.
- Salt: flaky sea salt in the frosting for a counterbalance to all the sweetness and richness; start with less and add to taste if you aren’t sure whether you’ll like the sweet and salty combo.
Variations
If you want more texture in your brownies, try stir-through additions in the batter like chocolate chips or chopped chocolate, or chopped roasted peanuts for extra crunch.
Want more texture and decoration in one? Finish the brownies with extra chopped peanuts or crushed peanut brittle on top of the frosting.
If the high ratio of frosting to brownies doesn’t appeal, halve the frosting quantities to make a thinner layer. Or ditch the peanut vibe altogether and serve your brownies unfrosted, with a dusting of powdered sugar and flaky salt.
How to make chocolate and peanut butter brownies
View, save and print the recipe card further down in this post; read on for the visual walk-through.
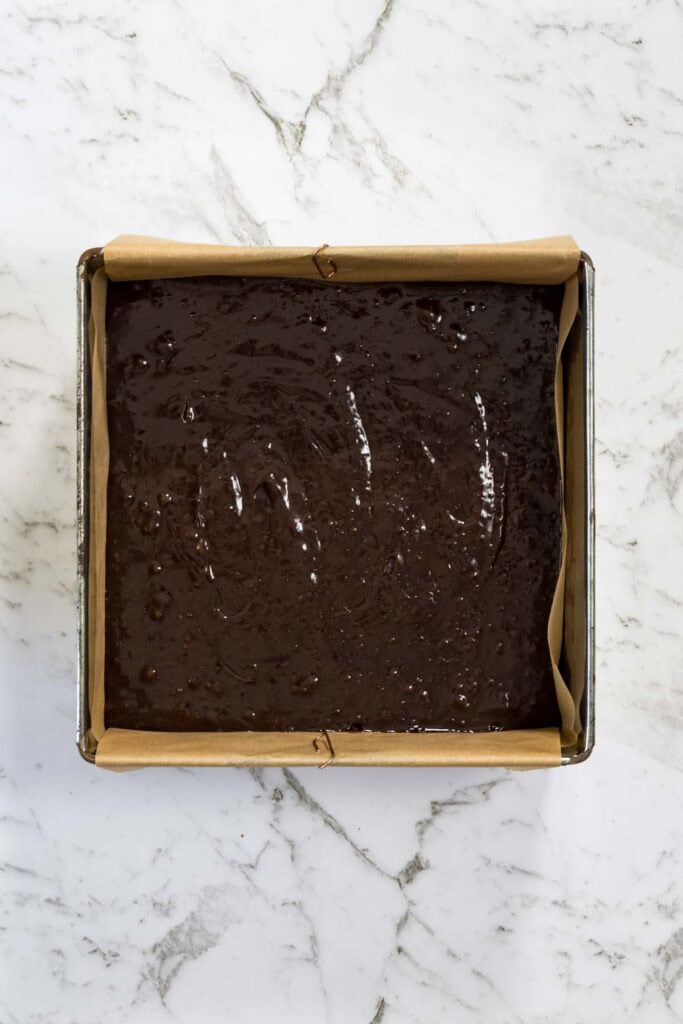
- Line an 8 inch (20cm) square pan with baking paper or foil, leaving overhang so you can lift out the finished slab of brownies. Preheat your oven (note conventional and combi steam directions in the recipe card).
8. Cool completely in the pan.
Tips for success
Brown, don’t burn: stop cooking the butter when the solids are golden and smell nutty.
Cool the chocolate mixture slightly before adding eggs to avoid scrambling.
Fold, don’t beat, once the dry ingredients go in to keep the texture fudgy.
Use visual doneness cues as well as time: set, matte top and clean skewer from the centre.
If your kitchen is warm, chill before slicing so the frosting stays put and cuts cleanly.
Chocolate and peanut butter brownies serving suggestions
Cut into about 20 squares or bars; they’re rich, so smaller pieces work well.
For neat slices: chill the frosted slab, use a hot knife, and wipe between cuts.
Serve slightly chilled for a fudge-like texture, or closer to room temperature for softer brownies.
Store in an airtight container:
Up to 2 days at cool room temperature.
Up to about 5 days in the fridge.
Avoid stacking unless brownies are well chilled, or separate layers with baking paper.
There you go! These chocolate and peanut butter brownies are a fast, reliable way to get a deeply fudgy, bakery-style treat from your own kitchen. They’re rich, adaptable and easy to store, making them a great go-to dessert whenever a chocolate and peanut butter craving hits.
Spread the word
If you’ve made and enjoyed this recipe (or any others on the site!), would you leave a review and rating? Reviews are incredibly helpful to other cooks, and help me understand the sorts of content you enjoy or questions you have. You can rate and review any recipe by clicking the star icons at the top of the recipe card.
Brownies with Salted Peanut Butter Frosting (only 12 minutes to cook!)
Ingredients
For the brownies
- 6 oz unsalted butter cold is fine, cubed
- 3.5 oz dark chocolate chopped, or use buttons
- 3/4 cup superfine sugar caster sugar
- 1 tsp vanilla extract or vanilla paste
- 3 eggs large, lightly beaten
- 1/2 cup Dutch process cocoa powder
- 1/2 cup all purpose flour plain flour; spelt also works well, so does almond meal if you want a gluten free sub
- 1/2 tsp salt
For the frosting
- 3.5 oz unsalted butter softened
- 3/4 cup smooth peanut butter Now is not the time to go all natural, salt and sugar free, people. Skippy or Kraft is just fine.
- 1 cup confectioners sugar icing sugar
- 1 tsp flaky sea salt Maldon is my preference; use a little less salt to start with and add to preference
Instructions
Make the brownies
- Grease and line a 8"/20cm slice or cake pan, making sure your lining paper extends over two sides for ease of lifting later. Preheat your oven to 320˚F/160˚C, combination steam setting. If your oven has variable steam settings, use 80% steam. If not, don't worry! Just set to combination steam at the correct temperature and the oven will figure out the humidity for you.
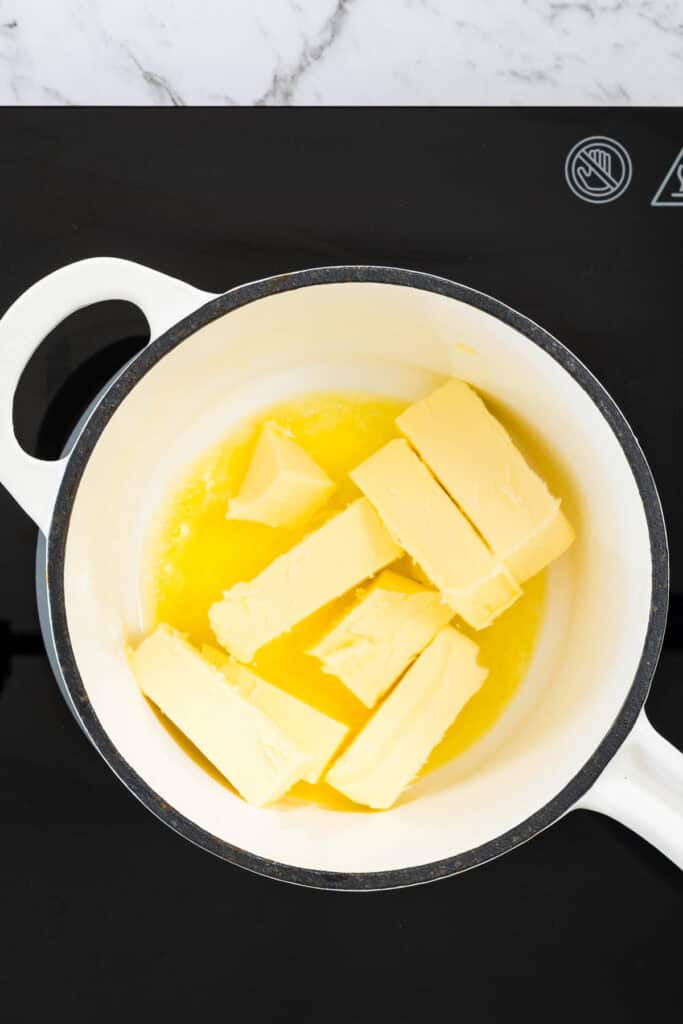
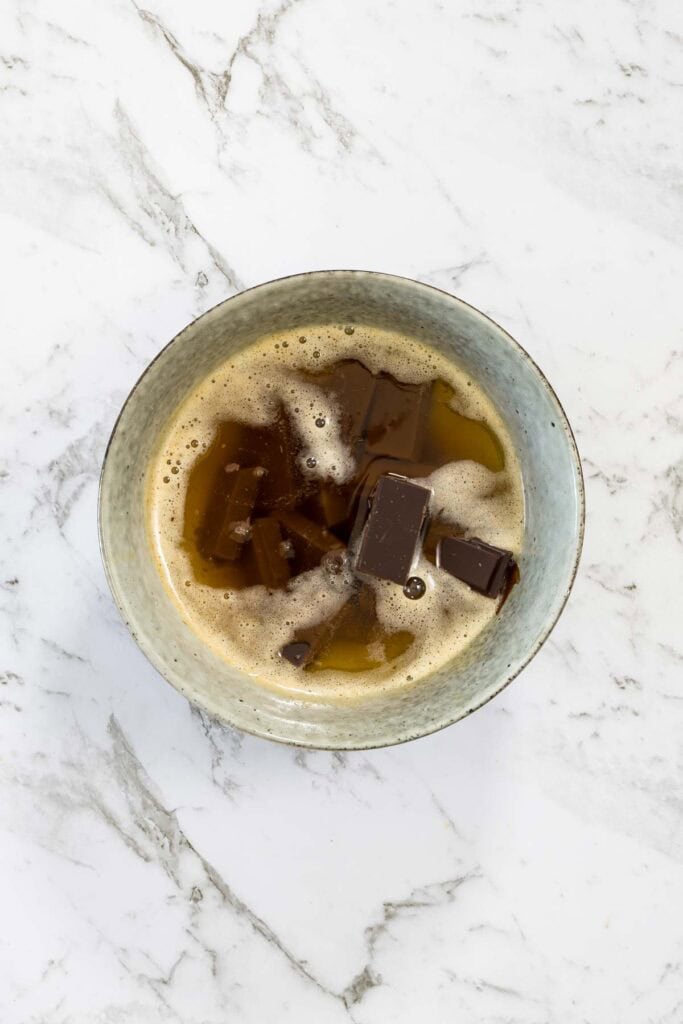
- Pu the butter in a small saucepan over medium heat. Let it melt and then come to the boil and cook, swirling the pan frequently, until it's stopped foaming and the milk solids begin to brown. It will take about 5 minutes, and you'll know it's close when the foamy bubbles on top give way to smaller more distinct bubbles. It'll smell like caramel and nuts and the solids will drop to the bottom and change colour. Take it straight off the heat and pour into a heatproof bowl to avoid burning it.
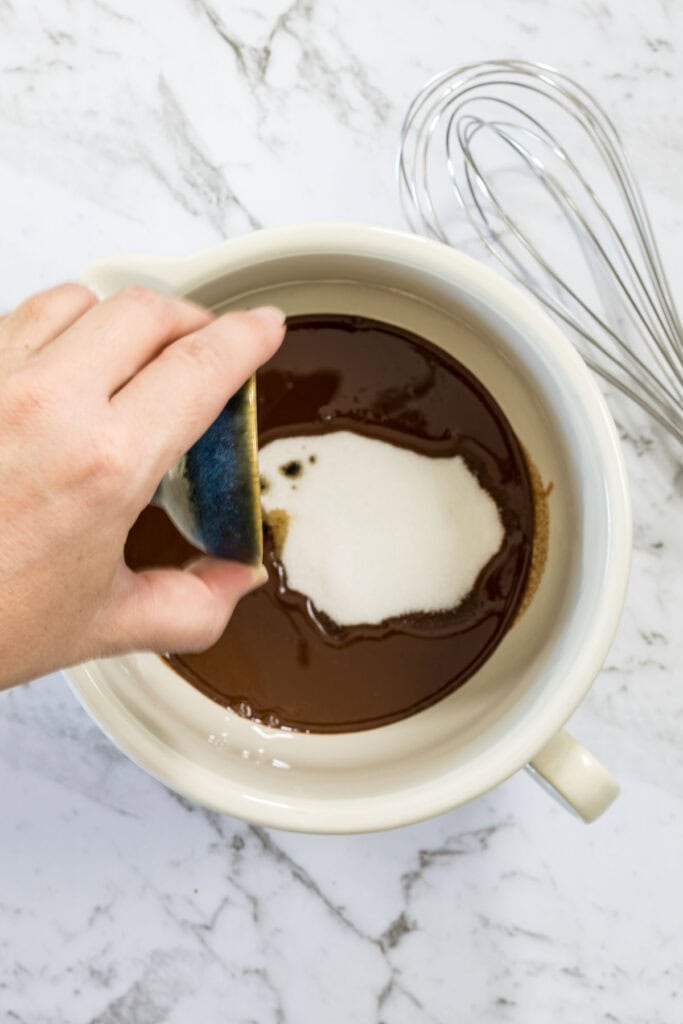
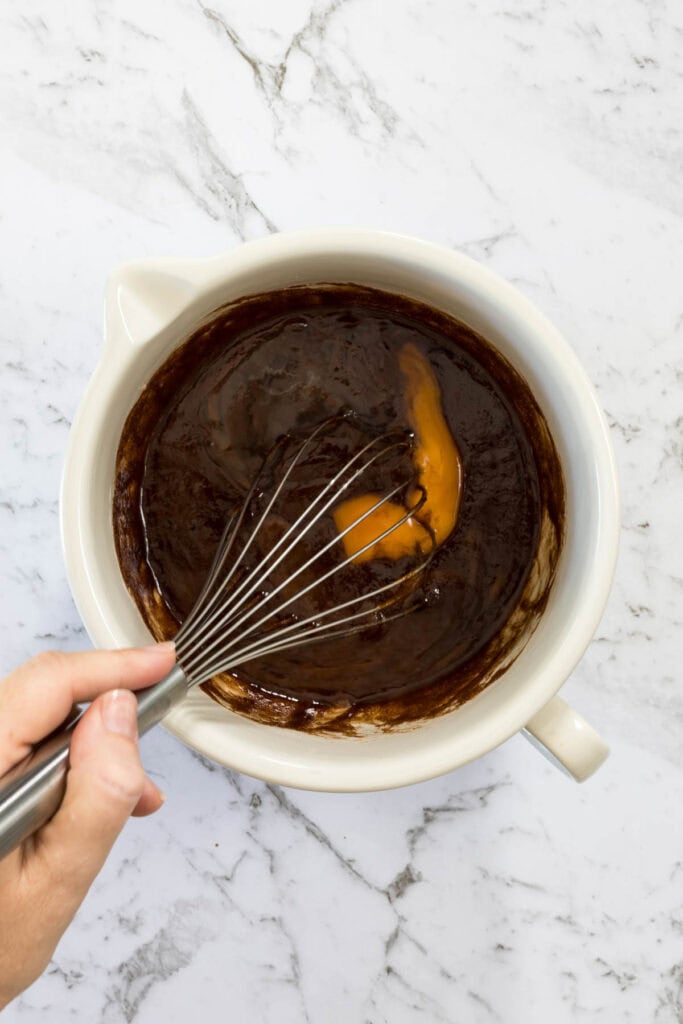
- Add the chocolate to the hot butter and leave it to sit for a couple of minutes so the chocolate can melt. Stir to combine, then whisk in the sugar and vanilla. Leave to cool slightly, then add the eggs and mix well (adding them when it’s too hot will leave you with scrambled eggs in your batter).
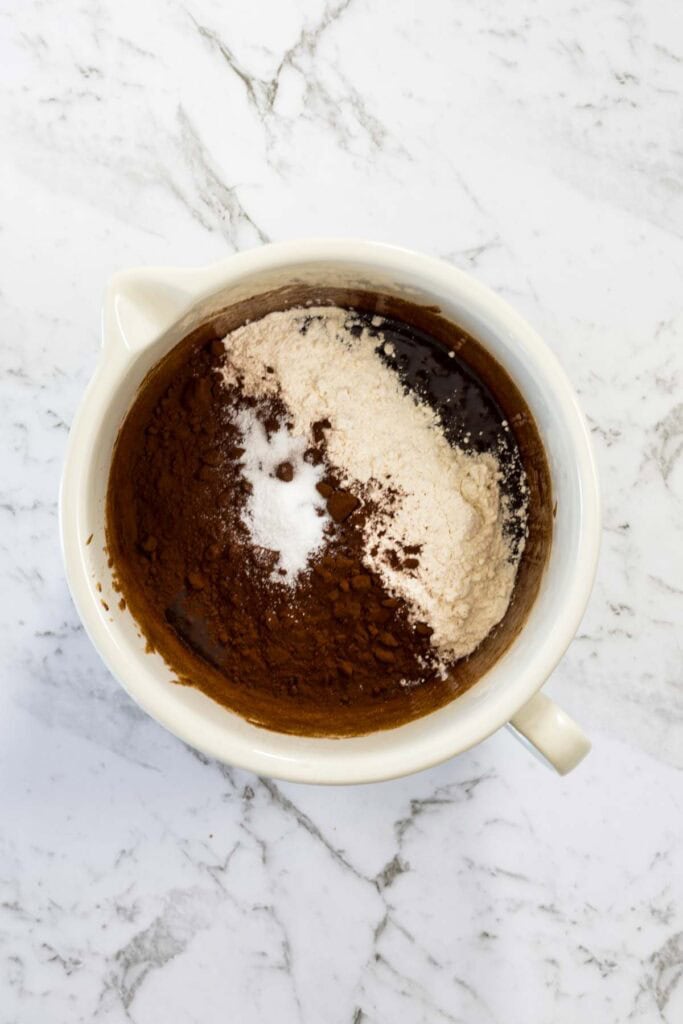
- Sift the flour and cocoa into the bowl and add the salt. Stir gently until everything is combined, then pour into the lined pan.
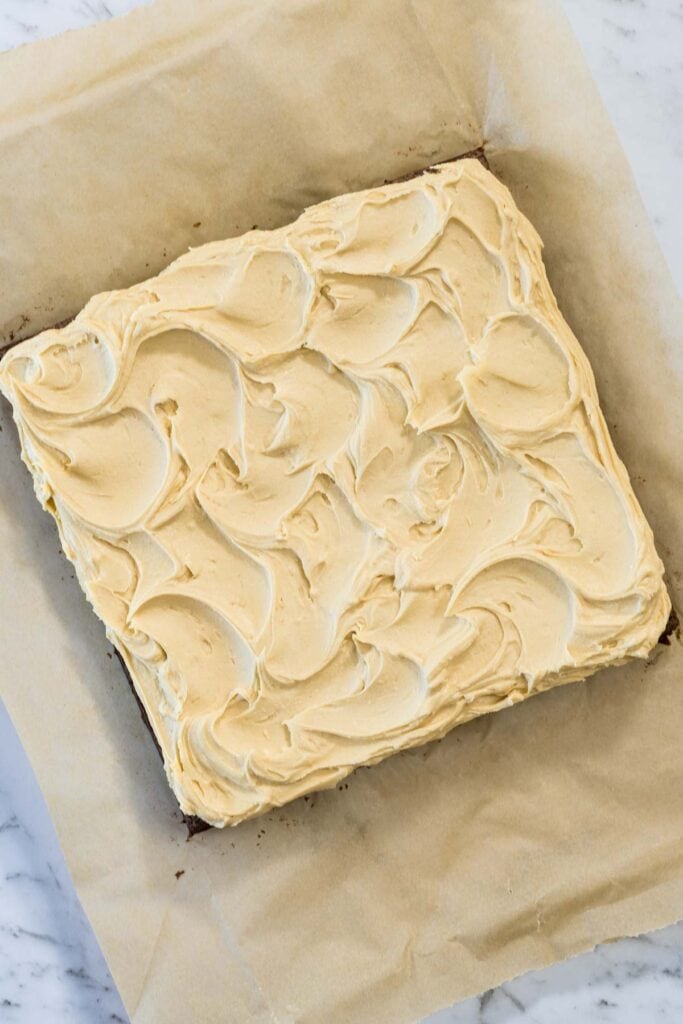
- Bake for 12 minutes, or until the top is set and a skewer tests clean in the centre of the tray. Remove from oven and leave to cool completely in the tin before spreading the frosting over the top.
Make the frosting
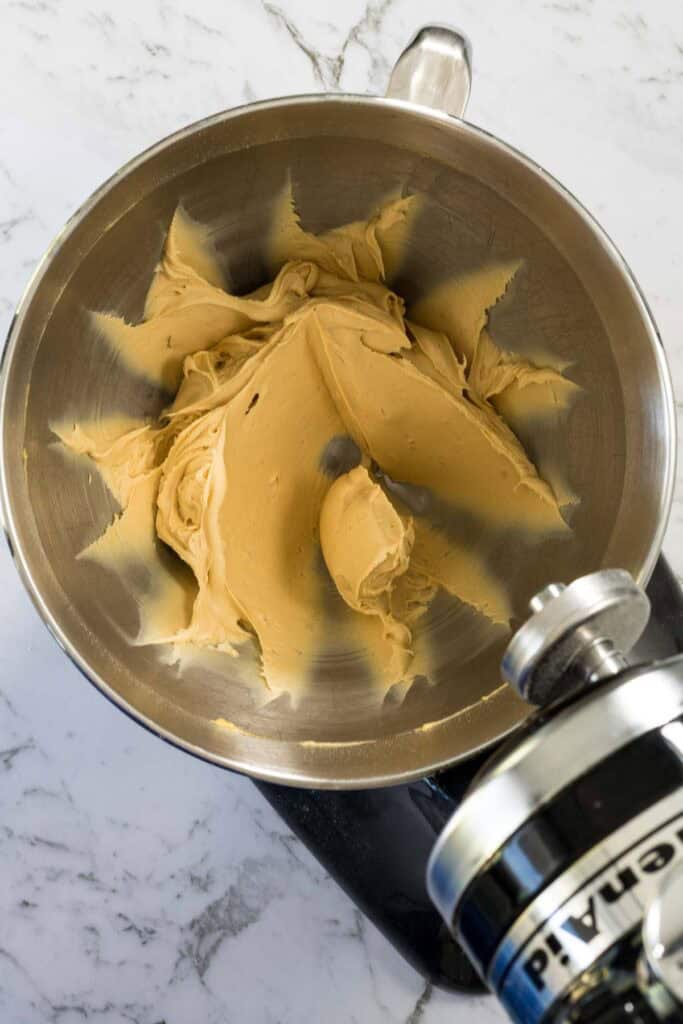
- To make frosting, put all the ingredients in the bowl of an electric stand mixer fitted with the paddle attachment. Beat for 3-4 minutes on medium speed, until the frosting is light and fluffy. I’d recommend starting out with 1/2 tsp salt in there and gradually adding more to taste if you want it.
- Serve cut into squares or bars; I cut into 20 pieces but you decide how big you want yours to be! The brownies will keep, covered, at room temperature for a couple of days, or in the fridge for about 5 days.
Notes
- A note on browned butter: if you haven’t been introduced to the joys of nutty, toasty browned butter in baked goods yet, you’re welcome. Also, I’m sorry, because if you’re like me, once the discovery’s been made you won’t be able to just leave things alone and will be substituting it for regular melted butter in all sorts of delicious places. Namely: brown butter chocolate chip cookies, brown butter pound cake, spiced pumpkin cake with brown butter, brown butter cookies…
- A note on the frosting: I suspect thanks to life in a warm climate, I found my first batch of frosting soft to the point of melting off the brownies. I’ve revised ingredient quantities to stiffen it up somewhat but didn’t want to lose the lovely soft texture altogether. Because of this I’d recommend not stacking the cut brownies on top of one another for serving/storage (unless they are fridge-cold), or you’ll end up with a brownie layer cake. Also, if you want nice clean-cut pieces, you’ll need to chill the whole slab before cutting with a hot knife to prevent the frosting smudging.
- Though a lot of baked goods are best served at room temperature, I actually prefer these slightly cooler so the brownie is almost like a piece of fudge in texture.


10 Responses
My family loved this! I did need to cook it for twice as long as suggested 🤷♀️ but was super yummy!
Pinterest is my thing for recipes so thanks for getting that set up!
Just delicious. I make it with almond meal.
Always very well received.
Love this recipe and so does my whole family! I make it regularly now. I use a ceramic dish, because that’s the only 20cm one I have, so it takes about double the time to bake (as per Emily’s response to the previous comment). I reduce the amount of peanut butter frosting because we felt it was not in proportion to the base after making it the first time. I do 75g butter with 110g peanut butter and 90g icing sugar, so about 3/4 the original amount, and I still feel like it is borderline too much frosting for our taste. I use a mini chopper for the frosting, so I begin by grinding the peanuts into a peanut paste, then I add the remaining ingredients. Sometimes there will be a chunk of peanut that didn’t grind properly and the crunch is actually quite yummy. So if you only have crunchy peanut butter, I think it would still work. Definitely a fantastic recipe.
Thanks for your feedback Luke, I’ll add a note to the recipe. Glass vs metal definitely makes a big difference in cooking time, it’s something I’ve mentioned frequently elsewhere regarding steam oven cooking, particularly for dishes which don’t take a long time to cook. The glass/Pyrex takes much longer to heat up and transfer that heat through to the food, so it will extend your time by probably double in this recipe.
I used an 8 inch square Pyrex baking dish, and I increased the combination steam oven cooking time by 9 minutes, and it was still wet in the middle. I finally pulled it in fear of it overcooking. I’m not sure if cook time change that much between a metal and glass dish, but if so I would make a note about that.
I would also recommend in the ingredients list to put “1/2 to 1 tsp flaky salt” so that one doesn’t add the 1 tsp into the mix before reading the next sentence after “put all the ingredients in the bowl of an electric stand mixer” (speaking from my over zealous experience).
Really yummy! The browned butter adds a nice twist. My Wolf CSO does not have a "combination steam" setting so I figured "convection steam" would be the closest. I had to bake it 4 more minutes but it was a wonderful success! Last night I made your potatoes/salmon/asparagus when i used my new oven for the first time and was blown away! keep these recipes coming! 🙂
Brilliant recipe! Lots of happy people!
Thanks Lisa.
Do you just substitute the same weight of this blend for the plain flour?
I bet the buckwheat gives a really nice nuttiness and structure to the mix. 🙂
You might want to try this flour mix for gluten free ones too:
700g fine white rice flour
200g potato flour
100g tapioca flour
100g buckwheat flour
1tsp xanthan gum
(Add 1 1/2 tsp gluten free baking powder & 1/2 tsp salt if you want SR flour)