


This steam oven pumpkin pie comes courtesy of my gorgeous friend in California, Rachel. A pastry chef and food stylist by trade, Rachel’s recipes are foolproof and utterly delicious, and we’ve bonded over our love for steam oven baking!
Though I love the food and traditions of Thanksgiving, it’s not a holiday we celebrate in Australia. Because of this, when it comes to this quintessential Thanksgiving dessert, I defer to the experts and embrace Rachel’s tradition instead of my own.
As an Amazon affiliate I earn from qualifying purchases. This post may also contain other affiliate links, which means I may earn a commission if you click through and make a purchase, at no additional cost to you.

Steam oven pumpkin pie vs regular pumpkin pie
If you’ve been here a while, you’ll know that I try not to create steam oven recipes for the sake of it. I think the entire point of a steam oven is to complement things you already make, and if you’re going to switch up your cooking methods, there should be good reason for it!
Luckily, in the case of steam oven pumpkin pie, there’s a great reason. Baking the pie using combi steam means the filling is super even and creamy. I’ve now baked this recipe in a conventional oven and a steam oven; the regular version was great, but not a patch on the texture of this combi steam method. Rachel says the same!
Tips for the best pumpkin pie crust
Rachel and I both have a thing for ginger, and she uses Annas Ginger Thins to make a crumb pie crust. It’s a genius move. Although you could use most kinds of sweet cookies in your pie crust, or indeed use a standard pastry crust, the ginger here offsets the pumpkin so, so well.
The first time I made this pie, I used Gingernut biscuits. If you’re Australian you’ll know exactly what I’m talking about and if you’re like me, you’ll have eaten a fair few of them over your lifetime! They make a fabulous and very gingery pie or cheesecake crust.

For the photographed version of this pie, I had a pack of Digestives to use up (UK readers, I’ve got you covered here!). Digestives aren’t gingery at all, so I added a heaped half teaspoon of ginger powder to the crumbs and the crust was excellent. Firm and just a little crunchy, but easy to cut and it held together fantastically.
All this to say, I’m confident this recipe will work with most cookie crumbs in the crust, so use something that you have on hand or is easy to get! If it’s not a ginger cookie, add a little ground ginger to the crust when you mix in the butter. The key is just to make sure the crumbs have enough butter to make the mixture like damp sand. That ensures it’ll hold together after baking instead of being powdery and dry.
Steam oven pumpkin pie filling tips
I’m the first to admit that canned pumpkin puree is not for me. I find it bland and tasteless, and the fact it’s hard to get where I live gives me all the more incentive to just make my own. I make it often and use it in all sorts of dishes, from cheesecake to casseroles and soups. And, yep, pie.
Homemade pumpkin puree can be frozen in portions and keeps for a good 3-6 months, so definitely make more than you need.
Making your own pumpkin puree is easy (especially with your steam oven!), so I hope you’ll go the extra step here. Canned puree will make a very acceptable pie but homemade is richer and silkier and fuller flavored every time.
Steam oven pumpkin pie step by step
The printable version of this recipe, complete with notes, is at the bottom of the post, but read on for the visual learners version. 😉
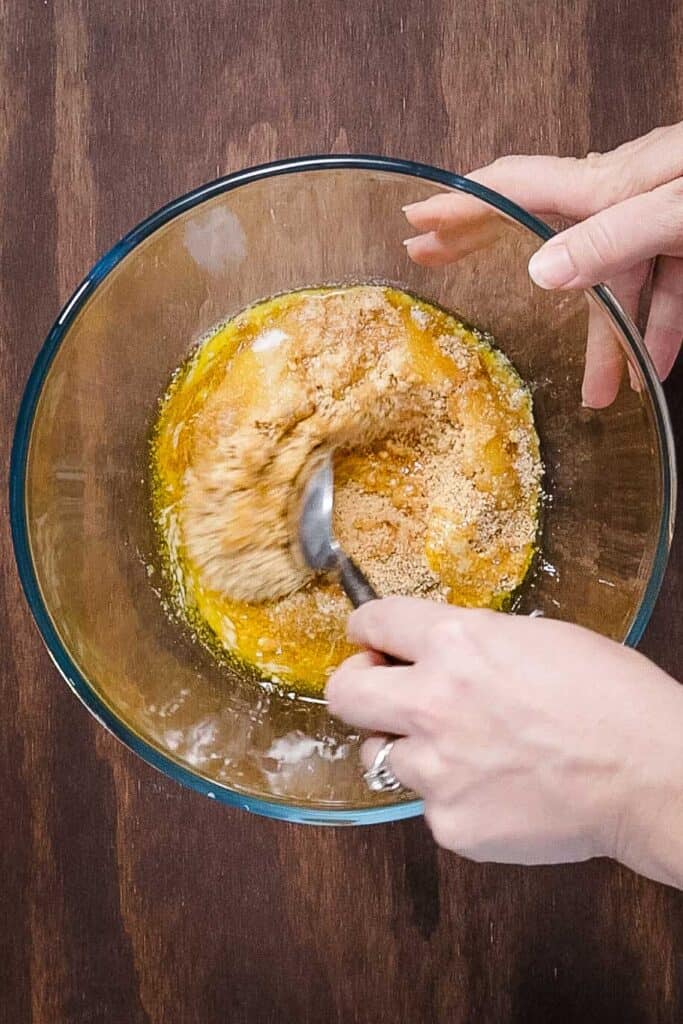
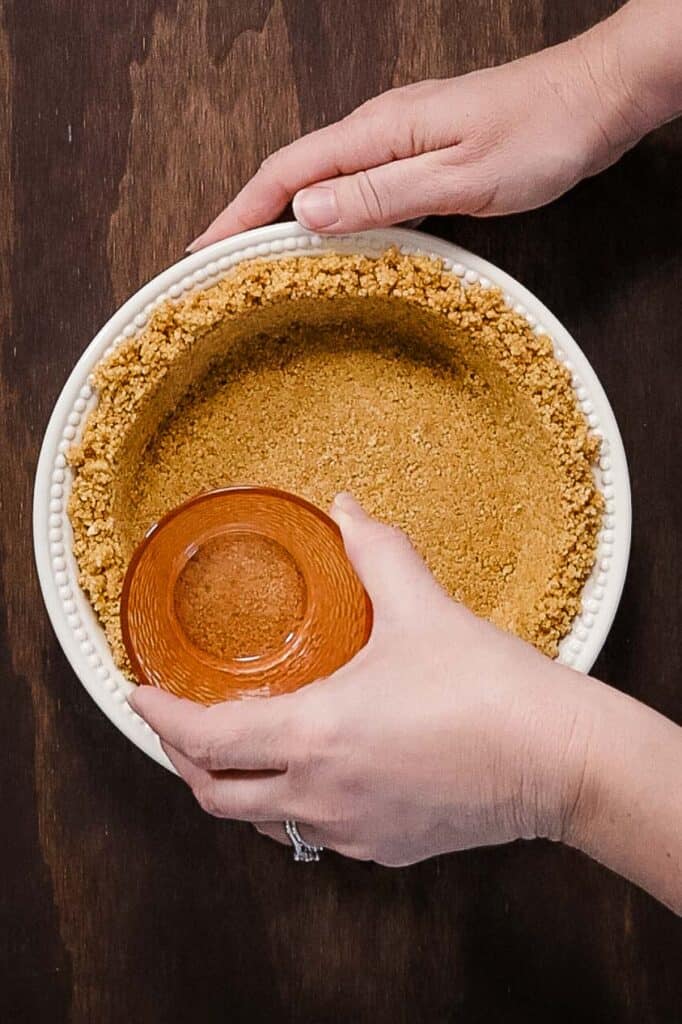
First up, make your crust. If you haven’t turned your cookies into crumbs, do that. Then mix with the sugar, butter and salt until it forms a damp sand texture. Press the mixture into a 9 inch pie plate, using the bottom of a glass to smooth it out and press right into the corners. This little extra step makes the crust really even instead of too thick at the corners (though can I confess that I kind of love the thick corners of a pie or cheesecake crumb crust?!).
Freeze the pie crust while you make the filling.
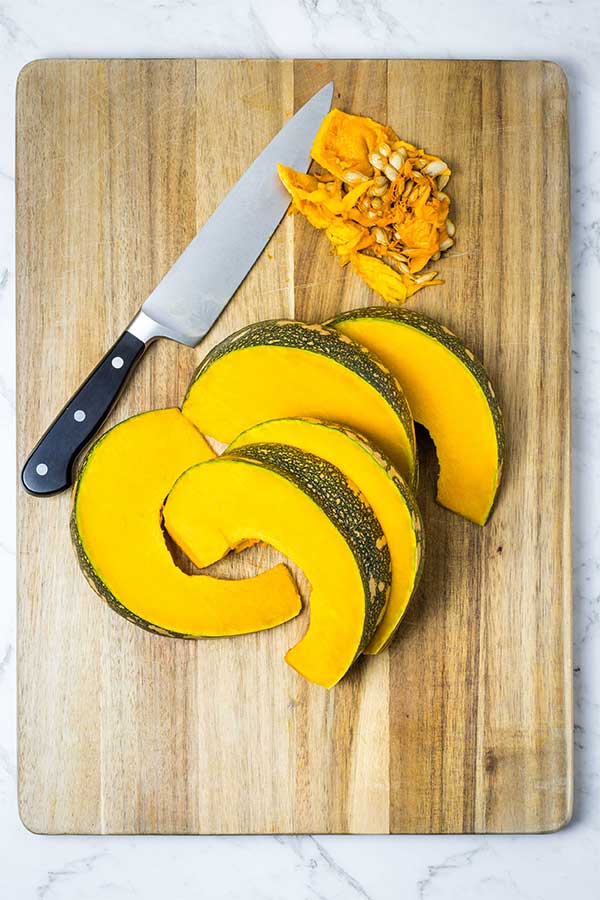
Preheat your oven and get onto the filling next. First up, we’re going to cook the pumpkin down to drive off a little moisture and make the texture extra smooth. Some recipes I’ve seen don’t do this but I love the richness of the finished pie using this method.
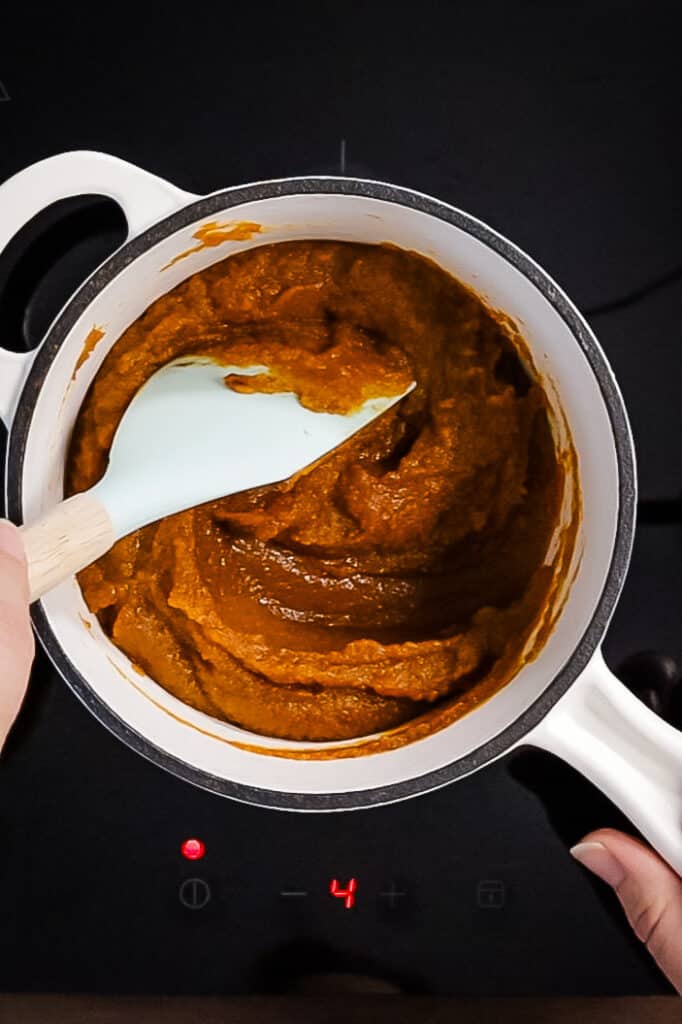
When the pumpkin is shiny and smooth and a little dark, remove it from heat and let it cool for about 10 minutes before you proceed to the next step.

Whisk your eggs and cream together, then slowly pour this into the warm pumpkin mixture and whisk well to combine.

Pour the pumpkin filling into the chilled crust and get your pie into the oven. You need to bake the pie for around 40 minutes, but be guided by the dish, not the timer. What you’re looking for is a pie with a slight jiggle in the center. Soupy and it’s not done; completely solid and it’s overdone (although still very edible!). Let the pie cool to room temperature before serving.
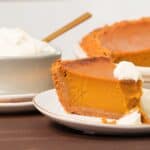
One final note here: normally I don’t find cream essential with pies and baked desserts, but here it’s a critical part of the finished dish, adding a softness and milkiness which foils the spices in the pie perfectly. Maple-spiked whipped cream is the way to go – just mix a couple of tablespoons of pure maple syrup into your cream as you whip it.
Loving pumpkins? Try these tasty pumpkin recipes for your next meal!
Pumpkin Dinner Rolls (combi steam and conventional methods)
Chorizo, Pumpkin and Chicken Combi Steam Tray Bake
Combi Steam Cauliflower and Pumpkin Soup
Spiced Pumpkin Cupcakes with Brown Butter Cream Cheese Frosting

Happy Thanksgiving!
Do you want to use and love your steam oven more?
Steam Oven Insiders is a membership for steam oven cooks who’d like to know, use and love their combi steam ovens more.
In addition to an ad-free experience across the entire Steam & Bake website, Insiders also get exclusive access to a growing library of premium content, from recipes (always!) to downloadable cooking charts and guides, seasonal steam oven cooking ideas and more, delivered straight to your inbox in a helpful and inspiring twice-monthly newsletter.
As an Insider, you get the opportunity to shape the content published here, by requesting recipes and asking your curly steam oven cooking questions.
Not ready to become an Insider just yet? I hope you’ll still enjoy the hundreds of free recipes and articles across the Steam & Bake site, and that you’ll consider joining us in future.
Steam Oven Pumpkin Pie
Ingredients
For the crust
- 1 3/4 cups ginger cookie crumbs see notes
- 2 Tablespoons granulated sugar
- 3 oz unsalted butter melted (plus more if needed)
- ¼ teaspoon fine salt
For the pumpkin custard filling
- 2 cups pumpkin puree 15 oz; butternut squash or pumpkin, either freshly roasted and pureed or canned; see notes
- 1/4 cup granulated sugar
- 1/4 cup brown sugar
- 2 Tablespoons maple syrup
- 2 teaspoons pumpkin pie spice
- 1/2 teaspoon ground cinnamon
- 3/4 teaspoon fine salt
- 2 eggs beaten
- 1 cup half-and-half or single/pouring cream
Instructions
Make the crumb crust
- In a medium bowl, stir together the cookie crumbs, sugar, melted butter and salt until well combined. The mixture should look like wet sand and hold together when pinched between your fingers. If it doesn’t, add more melted butter, a spoonful at a time, until it does.1 3/4 cups ginger cookie crumbs, 2 Tablespoons granulated sugar, 3 oz unsalted butter, ¼ teaspoon fine salt
- Pour the crumbs into a 9-inch (23cm) pie plate and press into an even layer, starting with the center and radiating outward. The corners of the pie crust often tend to be too thick. To avoid this, press a drinking glass or measuring cup along the inner bottom edge of the pie plate to thin out the corners of the crust and force it up the sides.
- Once your crumb crust is nicely packed down, smooth it out (a few bumps are fine), and chill in the freezer while you make the filling.
Make the pumpkin filling
- Preheat oven to combi steam setting, 350°F/180°C. If your oven has variable steam settings, use 50% steam. If it doesn't, don’t worry. Just set to combi steam at the correct temperature and the oven will figure out the humidity for you .
- Combine pumpkin puree with sugars, syrup, spices and salt in a saucepan and set over medium heat. Stir frequently, scraping the bottom of the pan, until hot and slightly caramelized, about 4-6 minutes. The mixture will thicken, get darker in color and take on a shine; if it sputters, it’s done. Remove from heat to cool slightly.2 cups pumpkin puree , 1/4 cup granulated sugar, 1/4 cup brown sugar, 2 Tablespoons maple syrup, 2 teaspoons pumpkin pie spice, 1/2 teaspoon ground cinnamon, 3/4 teaspoon fine salt
- Whisk the eggs together with the half-and-half or cream in a small bowl, then slowly whisk into the warm pumpkin mixture until smooth.2 eggs, 1 cup half-and-half
- Pour into the prepared pie crust and bake just until the center of the pie remains wobbly, approximately 40-45 minutes. Check for doneness by shaking the pie lightly but quickly. If the filling sloshes around it’s not done; it should be just a little jello-like in the center. If it looks completely solid, it’s overdone (don’t worry, just make extra whipped cream for serving!).
- Remove pie from oven and set on a wire rack to cool completely. The filling will set and firm up as it cools. Serve with freshly whipped cream spiked with maple syrup.
Notes
- Rachel’s advice (which I happen to totally agree with): you can use canned pumpkin but if you’re going to roast your own pumpkin for pie, butternut is the way to go. Pumpkins (even ‘sugar pie’ pumpkins) can be bitter or stringy, but butternut is beautifully sweet and smooth every time, and satisfyingly bright orange. Pumpkin puree can be made up to 5 days in advance and kept in the fridge, or up to 3 months in advance and frozen.
- Rachel uses Anna’s Ginger Thins for her cookie crumbs. I use the same, or ‘gingernut’ cookies which are available readily in Australian supermarkets but hard to find in the USA. You can also use Biscoff cookies, which are less gingery and more cinnamon-y, but very delicious.
- Unbaked pie crust is happy, tightly wrapped in the freezer, for months. So you can definitely get ahead with that step.
- Baked pie keeps up to 48 hours at cool room temperature.
- A lot of people chill pumpkin pie, and some even prefer to eat it straight from the fridge. A freshly baked pumpkin pie doesn’t need to be refrigerated but if you’re concerned about food safety, cover and refrigerate after the pie has cooled completely. Rachel recommends baking the day before, or morning of the day you plan to serve so it cools slowly. You’ll have the lighter texture and fuller flavor of a freshly baked pie without it sitting out too long.


")


6 Responses
Oh, Cindy, I’m so thrilled to hear you loved this! It’s such a great recipe, and you’re right, the texture of the filling is something very special. Happy (not) Thanksgiving to you!
I just made this for our (not) Thanksgiving dinner (Not American Thanksgiving; not Canadian Thanksgiving). It was a huge hit. I have made the back of the label Libby’s pumpkin pie for at least 40 years but am trying to use my steam oven for more than a rice cooker and found this recipe. For other Canadians, I used Dare Simple Pleasures Spice Snaps for the crust – quite similar to Anna’s which weren’t available. The texture of the filling after cooking in the steam oven was just amazing! And I did use an organic canned pumpkin. Wonderful recipe!!! Bye Bye Libby’s!
I make my own because it’s hard to find – you’ve probably got everything in your pantry already, though! Quantities of the different spices vary, but I use 1 tablespoon of cinnamon, a teaspoon of ginger and a teaspoon of nutmeg, and half a teaspoon each of cloves and allspice. That’ll make more than you need but it’s handy in lots of baking recipes.
Where can you get pumpkin pie spice in Australia please? Alternatively, what is in it (& quantities please) so I can make it. Thanks
Yes, you could definitely use a regular rolled crust. I would parbake for sure with a pastry crust – it helps the bottom of the pie bake more evenly, plus it gives more structure to the pie overall.
Can you bake this pie in a regular rolled pie crust? Would you suggest par baking first? I struggle with getting the bottom of the pie baked and custard getting over baked. Thank you!