


Whether you prefer a large, classic New York cheesecake or love the idea of indulging in individual portions, sous vide cheesecake is a foolproof way to achieve the creamiest, dreamiest dessert with perfect texture every time.
This cheesecake recipe, or some variation of it, is my go-to dessert when I’m entertaining. It’s a simple, indulgent crowd pleaser and (the best bit) can be made well ahead of time.
In this post, we’ll delve into sous vide cheesecakes, exploring both whole cakes and individual jars, and I’ll explain why sous vide is the ultimate method for cheesecake perfection.
As an Amazon affiliate I earn from qualifying purchases. This post may also contain other affiliate links, which means I may earn a commission if you click through and make a purchase, at no additional cost to you.

The benefits of sous vide cooking for cheesecakes
Before we get into the nitty-gritty of making sous vide cheesecakes, let’s talk about why this cooking method is a game-changer.
Sous vide, which means “under vacuum” in French, involves cooking food in a consistent, low temperature environment; either a water bath or a steam oven. Purists would say it MUST be a water bath and a vacuum bag, but the results either way are almost identical.
Sous vide offers some specific advantages when it comes to cheesecakes:
1. Precision: Maintaining a precise temperature is crucial when making cheesecake. Sous vide eliminates the risk of an oven that runs too hot or too cold, resulting in a perfectly set, creamy cheesecake.
2. No over or under-baking: Traditional cheesecakes can be finicky, with concerns about cracks and knowing when the cake is cooked. With sous vide, these worries become a thing of the past. Say goodbye to cracked tops and uneven baking.
3. Even texture: The gentle and controlled cooking of sous vide ensures your cheesecake never gets dry or grainy, and comes out with a texture that’s completely even all the way through.
Want to bake steam oven treats your family and friends will go crazy for? Get my book,
Steam Oven Baking: 25 sweet and stunning recipes made simple using your combi steam oven
Water bath or steam oven sous vide cheesecake?
While sous vide is the star of the show for cooking cheesecakes, you have a couple of options when it comes to how you go about applying the technique. Both of these methods can yield exceptional results, but there are some differences to consider.
1. Water Bath: The traditional sous vide water bath method of cooking involves immersing your cheesecake into a container of temperature-controlled water. An immersion circulator heats the hot water bath to the correct temperature, cooking your cake evenly.
Because you need to submerge the cheesecake, a water bath is best suited to individual cheesecake cooked in jars. The lidded jars (I use 4-ounce glass mason jars or canning jars) can be fully submerged. A whole cheesecake in a pan makes that much harder to achieve.
Mini cheesecake in a glass jar is also adorable, and perfect for large parties because no one needs to slice and serve from a large cake. Just scatter a few berries on the top of each one and hand them out!
2. Steam Oven: Some steam ovens come with sous vide capabilities, making it possible to achieve the same consistent temperature control as a water bath. If you have a steam oven, it’s a very convenient option.
I now cook all my sous vide cheesecakes in a steam oven. I love that it allows me to cook an entire large, traditional cheesecake with the textural benefits of sous vide.
Love this cheesecake? Try these other recipes!
Mint Chocolate Cheesecake with Oreo Crust and Peppermint Candy
Step by step sous vide cheesecake
The full recipe for sous vide cheesecake is below in the printable recipe card. Read on for my visual walk-through, plus notes on adapting from a whole cake to small jars.
Before you start with this sous vide cheesecake recipe, you’ll need either a 9-inch (23cm) springform pan or 10-12 small glass jars with lids. For a springform, line the base with parchment paper so it’s easier to remove the finished cake.

If you’re going for mini cheesecakes, you can cut down the ingredient quantities. I’ve successfully done this recipe using three-fifths of the mixture, which fills 10-12 4oz jars. The exact ingredient quantities for mini cheesecakes is below in the recipe card notes.
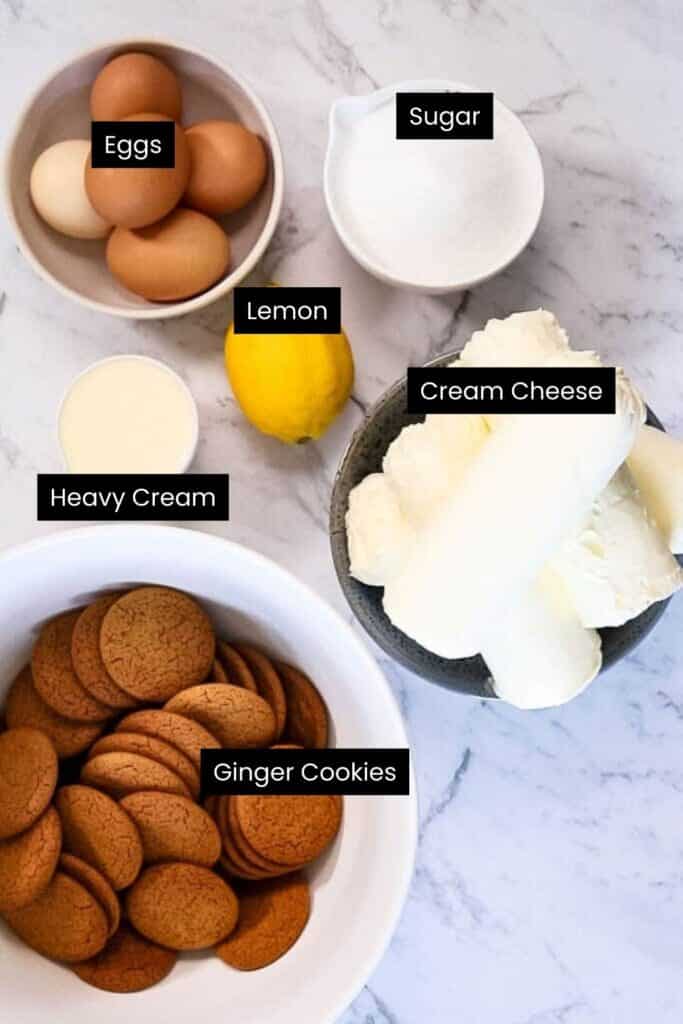
Start out by making the crumb crust. I love ginger cookies for cheesecake but a graham cracker crust is more traditional. Choose whatever you prefer; I’ve also used digestive biscuits for the crust mixture, they’re commonly available in the UK and Australia.

Blitz the cookies in the bowl of a food processor, then tip them into a large mixing bowl. Stir in melted butter until it looks like damp sand.

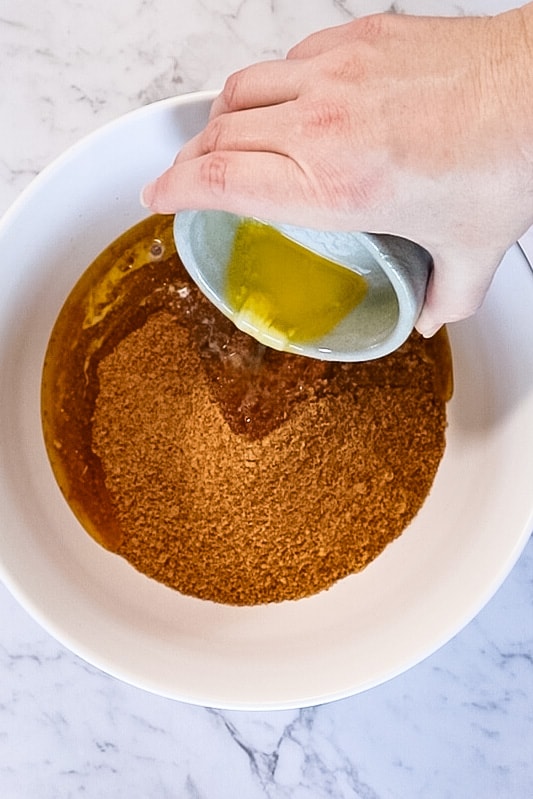
Spread this mixture into the base and up the sides of your springform pan, pressing down well with the base of a glass.

If you’re making individual cheesecakes, divide crumb mixture evenly between your jars, and press into the base of the jar. Put the finished crust/s into the freezer to firm up while you make the filling.

Give your food processor bowl a quick rinse and then make your cheesecake mixture. Process room temperature cream cheese with sugar until it’s smooth, then add the lemon juice, eggs and cream (or sour cream), and process again. You may need to use a rubber spatula to scrape down the sides of the bowl once or twice to ensure all the filling is smooth.


Pour the cheesecake filling into your crust or divide between the jars, leaving about half an inch (1.25cm) headroom at the top of each one. Jar lids should be screwed on to seal but don’t twist them too tight or they could explode when cooking.

For cooking the whole cheesecake in your steam oven, cover the top of the pan with plastic wrap or aluminum foil to avoid the cake getting wet. Place it in the oven to cook for 2 hours. Smaller, jar cheesecakes need one hour at the same temperature. If you’re using a sous vide bath, preheat the water using your sous vide machine before immersing the jars to cook for an hour.
At the end of cooking, cool the cheesecake in the switched off oven or in the water bath for an hour, then refrigerate for at least a few hours to set and firm up.

There you have it; perfect cheesecake! I don’t think a classic cheesecake needs much adornment, so I generally just opt for a pile of fresh berries served alongside to cut through the richness of the cake. If you want to take it a little further, spread a layer of steamed lemon curd across the top of the cheesecake before serving.
Don’t want to serve your cheesecake the same day? Store cooked cheesecake in the fridge for up to 4 days, or cover and freeze for up to a couple of months. Thaw it in the fridge before serving.
Have you made and enjoyed this recipe? I’d love if you’d be kind enough to rate and review it via the stars in the recipe card, and leave a comment below! Ratings and reviews help other readers to find and understand my recipes from a reader’s perspective.

Sous Vide Cheesecake
Ingredients
For the crust
- 12 oz ginger cookies in Australia I use ginger nuts; in the USA gingersnaps or graham crackers plus a teaspoon of ground ginger would work.
- 1/4 cup unsalted butter melted
For the filling
- 40 oz cream cheese full fat brick style (5 x 8oz packages), softened
- 1 cup granulated sugar
- 2 lemons juiced
- 5 eggs large, at room temperature
- 1/3 cup heavy cream
Instructions
Make the crust
- Preheat oven to Steam or Sous Vide setting, 175°F (80°C), 100% humidity. Line the base of a 9” (22cm) springform pan with parchment paper, sealing the collar of the pan around the paper and leaving an overhang sticking out at the sides.
- Put the cookies in a food processor and pulse until they form crumbs. Pour in melted butter and mix using the food processor. Press the crumbs into the bottom and up the sides of the prepared pan, compacting as much as possible. Put the pan in the freezer for 20 minutes.12 oz ginger cookies, 1/4 cup unsalted butter
Make the filling and cook
- Make the filling. Rinse and dry your food processor bowl. Put the cream cheese and sugar into the processor and run until well mixed and smooth. Add the remaining filling ingredients. Run the processor again, just until the mixture is smooth. Don’t overmix because your cheesecake will end up with air bubbles.40 oz cream cheese, 1 cup granulated sugar, 2 lemons, 5 eggs, 1/3 cup heavy cream
- Pour the filling over the chilled crust and tap the pan lightly on the counter to remove excess air. Cover the top of the pan with aluminum foil, then place in the oven and cook for 2 hours.
- At the end of the cooking time, the cheesecake should be set but with a wobble in the center. Let it cool in the switched-off oven for an hour, then carefully remove the foil so you don’t get condensation on top of your cake. Allow to cool for a further hour, then refrigerate for at least 4 hours (overnight is best) or up to 3 days.
- When you’re ready to serve, carefully run a thin-bladed knife around the edge of the cake to loosen, then remove the collar from the pan and transfer the cheesecake to a serving plate. Dress with sliced fresh fruit if you like, or go completely unadorned. Serve in thin slices.
Video
Notes
- If you’re going for mini cheesecakes and don’t want to make so many, you can cut down the ingredient quantities. To fill ten x 4oz jars, use the following quantities:
- For the crust, 6oz (170g) cookies and 2 Tbsp melted butter.
- For the filling, 24oz (750g; three standard sized bricks) cream cheese, a scant 2/3 cup (120g) sugar, the juice of 1 large lemon, 3 eggs and 3 Tbsp cream.
- You can use other cookies for the crust. I love ginger against the creaminess and lemony tang of the filling, but a regular digestive biscuit or graham crackers would be more traditional.
- Don’t want a lemon cheesecake? Omit the lemon juice and replace it with a teaspoon or two of vanilla paste or extract.
- You can swirl fruit preserves or berries through the filling before cooking, if you like. If you’re using preserves make sure they aren’t too wet as that will alter the texture and can split the filling.
Nutrition
Do you want to use and love your steam oven more?
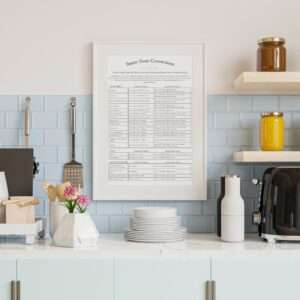
Steam Oven Insiders is a membership for steam oven cooks who’d like to know, use and love their combi steam ovens more.
In addition to an ad-free experience across the entire Steam & Bake website, Insiders also get exclusive access to a growing library of premium content, from recipes (always!) to downloadable cooking charts and guides, seasonal steam oven cooking ideas and more, delivered straight to your inbox in a helpful and inspiring twice-monthly newsletter.
As an Insider, you get the opportunity to shape the content published here, by requesting recipes and asking your curly steam oven cooking questions.
Not ready to become an Insider just yet? I hope you’ll still enjoy the hundreds of free recipes and articles across the Steam & Bake site, and that you’ll consider joining us in future.


16 Responses
This was amazingly delicious! I had not made a cheesecake in years and doing this in the combi steam oven was so easy! I made it for a family dinner and everyone loved it. My (adult) grandson was iffy about cheesecake, having had some good ones and some not so good, but he had seconds of this! So did my husband and son. One thing I would mention is that you should follow the directions and do the filling in the food processor. I thought I would use my stand mixer (so I wouldn’t have to wash out the food processor right away)…big mistake! Had to use the food processor anyway!
I made the filling and froze it in individual jars to thaw overnight before serving with any topping, like the crust cooked separately and broken up on top. One favourite here is maple syrup. Wonderful dessert to have on hand.
Made this in small Mason jars – it was delicious and enjoyed by all.
Think I might make lemon curd or a fruit couli to go on top next time – there will definitely be a next time!
Oh, thanks for updating with the recipe, Rachel! I have Stella’s book so I’ll definitely look it up. 🙂
@EmilyRhodes, thank you for your response on using sous vide on butter and cream cheese. I am excited to try it. The recipe is the Cream Cheese frosting from the Bravetart Cookbook by Stella Parks. I am so happy to have found your website and look forward to trying some recipes using sous vide.
That sounds like a very complex frosting recipe, but also absolutely amazing! Yes, I think sous vide to warm the butter and cream cheese would work perfectly; you’ll know it’s exactly the right temperature that way.
This process sounds absolutely amazing. I am definitely going to try it. My sous vide cooker and container are arriving today. Your recipe has gotten me wondering if it is possible to put butter and cream cheese in a glass bowl and warm them using sous vide to a certain temperature? Can that be done? The reason I ask is that I am planning to make a custard-based cream cheese frosting recipe that calls for adding 68 deg F custard to a butter/cream cheese mixture that was begun when the butter and cream cheese were at 65 deg F. I have been trying to figure out how to get the custard to 68 F and the butter and cream cheese to 65 F simultaneously. Your recipe has me thinking that I can just heat the butter and cream cheese using sous vide to 65 F while I wait for the custard to reach 68 F. Then, I can mix the butter/cream cheese and start adding the custard to it. What are your thoughts on that? Thanks.
I think you could add a half hour to the cooking time for the larger pan/volume. The low temp means you aren’t likely to overcook it, so if you’re still worried it’s too liquidy with the extra time, add a further 15 minutes.
How much time extra will the cake require if I use a 25cm x 7.5cm springform ?
I’ve calculated by volume that it’s roughly 40% more volume than a 23 x 6cm springform. Thank you in advance for your reply.
I don’t think the ring will be a problem as far as the cooking of the cake goes, but you may have trouble getting it out of the pan later, unless it has a loose base. You could try lining the pan with cling film to make it easier to lift out, but sous vide cheesecakes are very soft and I think one with a hole in the center will probably lack the structural integrity to be lifted or turned out without breaking.
Hi Emily,
Thanks a lot for your amazing recipes!
Do you think I can bake a sous vide cheesecake with a ring cake covered with aluminum foil or cling film? (now water bath required)
Thanks in advance
This was cooked sous vide in my steam oven, which means no bag was needed. If you have a water bath sous vide I’d recommend going for the jars option, as you’ll struggle to remove all the air from a bagged whole cake without misshaping it.
I don’t understand. How do I place this in the sous vide? There’s no photo showing what you did. Do I place it in a bag and try and remove the air before submerging?
Awesome! Best I’ve ever made. New to steam oven and thankful for this recipe and all the tips
Apologies, the extended is a typo! Definitely 9 inch, now fixed.
Your extended description says 8in springform pan but the recipe card says 9in sprongfrom pan?